Quantcast
Channel: C# Archives - Blog Cybele Software, Inc.
Viewing all 101 articles
Browse latest View live

How to install Thinfinity VirtualUI

$
0
0

How to install Thinfinity® VirtualUI

Installing Thinfinity® VirtualUI v2.5 for the first time is pretty simple. It is pretty much a “next, next” installation.
There are just a few things you have to take into account. Let’s see check the installation steps:

1. Open up the setup file (previously downloaded from this page), on the first screen just click Next:

Install Thinfinity VirtualUI

2. Click “I accept the terms in the license agreement” and then “Next”:

Install Thinfinity VirtualUI

3. In this screen leave “Thinfinity® VirtualUI Server” and “Development Environment” selected and press ‘Next’.

Install Thinfinity VirtualUI

4. Leave “Standard Mode selected and click “Next”.

Install Thinfinity VirtualUI

5. If you wish to choose a different folder press “Change”, otherwise you can go to “Next” directly:

Install Thinfinity VirtualUI

6. Hit “Install”.

Install Thinfinity VirtualUI

7. After it ends, press “Finish”.

Install Thinfinity VirtualUI

In your start menu, you should have a new icon for “Thinfinity® VirtualUI”.

Install Thinfinity VirtualUI

Given that it’s the first time you use the software, the first screen you will see is:

Install Thinfinity VirtualUI

Select “Get a new Trial Serial Number” and press “Next”.

Fill your name and e-mail address and press “Next”, make sure this PC has internet access, otherwise contact sales@cybelesoft.com so they can provide you with a trial key:

Install Thinfinity VirtualUI

You should instantly get an e-mail with a trial key and will be redirected to the screen below where you can enter this information:

Install Thinfinity VirtualUI

If the registration was successful, you’ll see:

Install Thinfinity VirtualUI

If not, please contact support@cybelesoft.com
Just hit “Finish” and you’ll see your license registered:

Install Thinfinity VirtualUI

Now it’s time to publish your Windows apps!
NOTE: This is a first-time setup guide ideal for a quick trial. If you need to deploy Thinfinity VirtualUI in a large environment, you should take a look at this guide.
Should you need any assistance configuring Thinfinity® VirtualUI, contact us at support@cybelesoft.com or leave a message on this same post.

The post How to install Thinfinity VirtualUI appeared first on Cybele Software, Inc..


Host your Windows applications on AWS and run Desktop apps online

$
0
0

Host your Windows applications on AWS and run Desktop apps online

Publishing your application is very easy, there are just a few steps you have to follow.

Thinfinity® VirtualUI is a great solution to host your Windows-based applications on Amazon Web Services (AWS) and provide web access to multiple concurrent users.

While AWS allows you to enable multiple concurrent users to access to EC2 instances, Thinfinity® VirtualUI permits you to publish your Win32 apps to be accessed within a browser window.

This article covers many programming languages and app types, like C++, C#, Delphi, VB.NET, VB6, Windev, MS Access, Visual FoxPro and Visual FoxPro 9 (among others).

Tips to start:

1) Be sure you already have an .EXE file of your application compiled with Thinfinity® VirtualUI Libraries. New to VirtualUI? Just visit our Tutorial Page to find examples and guides for your current application language/project.

2) Also, we recommend you to test your application on a local environment before you go to the cloud. If you haven’t done yet, you can give this other tutorial a quick look:

https://www.cybelesoft.com/blog/how-to-virtualize-applications/
After you cover those steps locally, you’ll be ready to publish the app on your AWS instances.
Run Desktop apps online with VirtualUI and AWS

Thinfinity® VirtualUI will listen on port 6580 by default but you can change it to any available port. To verify the current port selected, open the Thinfinity® VirtualUI Server Manager:

Host your Windows applications on AWS and provide web access to multiple concurrent users

With this information, we can now go to AWS portal and open the port for Thinfinity® VirtualUI:

1. Go to the ‘Security Groups’ tab:

Host your Windows applications on AWS and provide web access to multiple concurrent users

2. Create a new Security Group:

Host your Windows applications on AWS and provide web access to multiple concurrent users

3. Add the port you configured in the Thinfinity® VirtualUI Server Manager (in this case we will use the default, ‘6580’ but you can set up any free port):

Host your Windows applications on AWS and provide web access to multiple concurrent users

4. Now select the Security Group on your VM. To do so right click on the VM and go to “Networking > Change Security Groups”.

Host your Windows applications on AWS and provide web access to multiple concurrent users

Last but not least, make sure port 6580 is also open on the Windows Firewall in the VM. You can add an inbound rule to be sure. In order to do so:

1. Run “wf.msc” to open Windows Firewall:

Host your Windows applications on AWS and provide web access to multiple concurrent users

2. Create a new inbound rule:

Host your Windows applications on AWS and provide web access to multiple concurrent users

3. Select Port and hit “Next”

4. Make sure “TPC” is selected and add the specific port. If you have the default port configured in Thinfinity® VirtualUI Server Manager just enter “6480” and hit “Next”.

5. Select “Allow all connections” and press “Next”.

6. Ensure “Public” is checked and press “Next”.

7. Add a name and description and press “Next.

Finally, you should be able to reach and run your Windows application over the internet from any browser!

If you have any question regarding this blog entry, you can leave a comment below or sends us an email to support@cybelesoft.com

Cheers!

The post Host your Windows applications on AWS and run Desktop apps online appeared first on Cybele Software, Inc..

How to host your desktop application on Azure with VirtualUI

$
0
0

How to host your desktop application on Azure with VirtualUI

Host your Windows Desktop applications on Microsoft Azure and provide web access to multiple concurrent users.
Hosting your desktop software in the cloud has many advantages that we’ve discussed on previous posts. Today we bring you this guide to learn how to host your desktop application on Azure.
Publishing your Windows OS application (written in Delphi, VB6, Access, .NET, etc) in this computing service created by Microsoft is very easy. There are just a few steps you have to follow.

NOTE:

  • This guide requires you already have an .EXE file of your Desktop application compiled with Thinfinity VirtualUI Libraries, if you don’t just contact us to get assistance: support@cybelesoft.com or leave a message on this same post.


Also, we recommend you to test your application on a local environment before you go to the cloud. If you haven’t done yet, you can give this tutorial a quick look.
After you cover those steps locally, you’ll be ready to publish the app on AWS instances.

Now that we have all the information we are ready to go!
Thinfinity® VirtualUI will listen on port 6580 by default but you can change it to any available port. To verify this, open Thinfinity® VirtualUI Server Manager:

Host your Windows Desktop applications on Microsoft Azure and provide web access to multiple concurrent users (Delphi, VB6, Access, .NET, ETC)

With this information, we can now go to Azure’s portal and open the port for Thinfinity® VirtualUI:

1. Go to the ‘Networking’ tab of your VM:

Host your Windows Desktop applications on Microsoft Azure and provide web access to multiple concurrent users (Delphi, VB6, Access, .NET, ETC)

2. Create a new Inbound security rule and add the port you’ve configured on Thinfinity® Remote Desktop Gateway, in this case ‘6580’:

Host your Windows Desktop applications on Microsoft Azure and provide web access to multiple concurrent users (Delphi, VB6, Access, .NET, ETC)

Last but not least, make sure port 6580 is also open on the Windows Firewall in the VM. You can add an inbound rule to be sure. In order to do so:

1. Run “wf.msc” to open Windows Firewall:

Host your Windows Desktop applications on Microsoft Azure and provide web access to multiple concurrent users (Delphi, VB6, Access, .NET, ETC)

2. Create a new inbound rule:

Host your Windows Desktop applications on Microsoft Azure and provide web access to multiple concurrent users (Delphi, VB6, Access, .NET, ETC)

3. Select Port and hit “Next”

4. Make sure “TPC” is selected and add the specific port. If you have the default port configured in Thinfinity® VirtualUI Server Manager just enter “6580” and hit “Next”.

5. Select “Allow all connections” and press “Next”.

6. Ensure “Public” is checked and press “Next”.

7. Add a name and description and press “Next.

Finally, you should be able to reach and run your Windows application over the internet from any browser!
Have any questions? Contact us at support@cybelesoft.com or leave a message on this same post.

The post How to host your desktop application on Azure with VirtualUI appeared first on Cybele Software, Inc..

Send an email from outlook or open a second application using OpenLinkDlg

$
0
0

Send an email from outlook or open a second application using OpenLinkDlg

In this tutorial, we will learn some of the use cases of our VirtualUI OpenLinkDlg method that allows you to display a popup with a button to open a web link.
In order to explain how this works, we’ll show you two of the most common use cases we have seen among our users. You can download this C# demo application and integrate it with Thinfinity Virtual UI
Thinfinity VirtualUI Open Link
One of the use cases involves the mailto: HTML email link expression. On the other hand we’ll be using this method to call a second VirtualUI application under a different browser tab.
About the mailto reference.
By clicking on a “Send E-Mailbutton you’ll be triggering the Open Link Dlg method which will open the end-user default email client and a new message we’ll be ready to be written with some of it’s fields pre-populated. These fields may vary from Sender, Subject Line and Email Body up to CC and BCC.
In the example below, we’ll be telling the end-user browser to open their default mail application, and prepare to send an email to both, mail@anymail.com and mail@2ndmail.com addresses, followed by doing a CC on mail@copymail.com and a BCC over mail@bccmail.com and finally the Email Subject and it’s Body.
Click on the following example and test it for yourself:
mailto:mail@anymail.com;mail@2ndmail.com?cc=mail@copymail.com&bcc=mail@bccmail.com&subject=Subject%20Test&body=Body%20Test
Thinfinity VirtualUI Open Link
As you can see, we have mailto: pointing to both, mail@anymail.com and mail@2ndmail.com separated by a Semicolon (;) and finishing the recipients field with a Question Mark (?). Followed by it we have the CC and right away we have the BCC separated in this case with an Ampersand (&). We can notice the same thing when separating the BCC from the Subject, and the Subject, from the Body. Also, as you may have noticed, you can add spaces by writing %20 in the text of the subject or body.
This is a simple process and if you do some research you can even find some online mailto generators. Now we can follow to the next example:
Open a second application with VUI’s OpenLinkDlg method.
Sometimes users need to open more than 1 application through VirtualUI on their browsers, and if you want your users to open your VirtualUI applications by doing just 1 single click, then the OpenLinkDlg method can be very useful for you.
Click on this link to download a second C# demo application to try this case.
Here you just need to know the direct link (URL) to the VirtualUI application you’ll be calling. Most of the times the URL is the same as the name of the VirtualUI profile pointing to that application (default behaviour), but you can change this if you edit the Virtual Path of your profile.
Here you can find a screenshot of the Profile we’ll be using today and it’s Virtual Path highlighted.
Thinfinity VirtualUI Open Link
By knowing our application Virtual Path, we can point our browser to our VirtualUI Server Address and load the application directly without visiting our landing page. In our case, we’ll be pointing the browser to the http://localhost:6580/EMM/ address.
The OpenLinkDlg Method.
You can implement this method easily calling it through the Virtual UI instantiated class and then using the OpenLinkDlg method passing two parameters:
Thinfinity VirtualUI Open Link
So the first parameter is for the virtual path of any other application web enabled with virtual UI. The second parameter is for the message you want to show to the end user on the dialog that will come up to access the second application if the browser doesn’t open the second application automatically.
Thinfinity VirtualUI Open Link
Do not hesitate to contact us. Write your questions and inquiries to info@cybelesoft.com

The post Send an email from outlook or open a second application using OpenLinkDlg appeared first on Cybele Software, Inc..

How to Cut the VPN Cord with the Thinfinity Clientless WebVPN

$
0
0

Clientless WebVPN is here to stay


So here is the problem.  Your users still need access to your company’s intranet sites and internal web applications while working from remote workspaces.  The provisional solution until recently has been VPN, which is irksome to deploy and opens your network to exploitable vulnerabilities.   Why connect your users to the corporate LAN when all they need is to access a URL?  Thinfinity is the new permanent solution to this conundrum.

The principle of least privilege security

With the proliferation of cyber threats today from an increasing number of global threat actors, it’s more important than ever to enact the principle of least privilege (PoLP) across your IT estate.  

PoLP states that users should be allotted minimum levels of access to perform their job functions.  So why give remote users direct connection access to your entire corporate LAN? All they need is to pull up a company intranet web page or a single web application. 

Using the Web VPN feature of Thinfinity, users no longer need to obtain a VPN connection.  Now their access can be limited to the specific intranet web assets that you specify.  

Clientless VPN access means fewer problems and maintenance

Internal IT departments are stretched enough as it is today.  The last thing they need is another client app to support.  Unlike VPN solutions that require the deployment of a client app that must then be supported, maintained, and updated, the Web VPN feature of Thinfinity doesn’t require a client.  In fact, there is nothing to install.  Simply whitelist the domain(s) you need to provide access to, and it will securely forward this connection to the end user’s HTML5 browser.

This image exemplifies how a clientless WEB VPN is configured with Thinfinity® Remote Workspace.
This image exemplifies how a WEB VPN is configured with Thinfinity® Remote Workspace.


Escape the problematic nature of VPN

There are a lot of moving parts within a VPN solution.  There is the VPN server and the installed local VPN app that is required on each client.  Then there are multiple protocols that must function correctly together.  The connected VPN clients must then obtain an IP address from the corporate network and there can be multiple firewalls and access lists to contend with across the connection.

Thinfinity is simple.

Users only require an HTML browser on their internet-connected device using simple web access. If your users can access the web, they can access anything hosted within your company’s internal domain. It really is that simple.

Reduce the threat of hackers and external threat actors

Why do hackers actively target company VPN systems?  Because once a VPN is compromised, an outside attacker now has potential access to your entire IT estate. This includes servers and your file storage repositories.  A compromised VPN connection is an open door into your network! 

With Thinfinity, you can be assured that those doors remain locked. No additional ports are required to access internal resources using Thinfinity.

The days of Legacy VPN are over

Security and simplicity can exist in one package.  With Thinfinity, burdensome VPN solutions are a thing of the past.  Our new web-based VPN has no client to install or maintain, so there’s no dependency. Remote users can easily attain access to the published applications and websites that are only accessible from within the internal domain itself.  

Whether it’s an intranet website, an internal ERP solution, or an internally hosted web application, your users will be able to easily access them, while also abiding by least privilege security standards. 

 Thinfinity Remote Workspace grants you VPN-like access, without the hassle of a traditional VPN. 

Would you like to evaluate this Clientless VPN alternative for free for 30 days?


Contact us

Have any questions about our clientless VPN solution? Our support team is always happy to assist you. Remote Support Cybele Software

You can either review the help files we’ve prepared for you, or email us at support@cybelesoft.com. All emails get a response!

We will be happy to assist you and show you our portfolio of remote access, desktop delivery, and app virtualization software products.

Explore our solutions, enjoy our free trials, or request a custom demo HERE. No commitment!

The post How to Cut the VPN Cord with the Thinfinity Clientless WebVPN appeared first on Cybele Software, Inc..

How to create a Web VPN connection with Thinfinity® Remote Workspace

$
0
0

Thinfinity® Remote Workspace includes an ingenious Clientless VPN which enables IT Admins to easily and effortlessly deliver access to Enterprise Intranet Applications.

Thinfinity® Remote Workspace manages to do all this, without the need to install an additional client on the end-user machine. Simply whitelist the domain(s) you need to provide access to, and it will securely forward this connection to the end user’s HTML5 browser.

You can find the steps to create a Web VPN connection here:

  1. Open the Thinfinity® Configuration Manager:

How to create a web VPN connection

  1. Once the Thinfinity® Configuration Manager is open, go to the Access Profiles tab from the top-left; then click on Add at the bottom-center and finally click on Web VPN:

Web VPN

  1. On the Profile Editor window, enter the web address for the Web VPN that you wish to set up under the “https://www” prefix under the Main entry point section, along with a Name to identify it on the Thinfinity® Remote Workspace landing page, then click Ok:

Clientless VPN

  1. You should see the new Web VPN connection added to the Access Profiles list. Click on Apply to finish setting up said connection:

Screenshot example

  1. After applying the changes, go to the Thinfinity® Remote Workspace landing page via browser, or through the General tab of the Thinfinity® Configuration Manager by clicking once on the binding and then on the Browse button:

Screenshot example

  1. On the Thinfinity® Remote Workspace landing page, you should be able to see the new Web VPN that you’ve just created:

Screenshot example

  1. You are now able to access your Web VPN connection through Thinfinity® Remote Workspace on the web!

Screenshot example

For detailed information related to Web VPN, you can check our Thinfinity® Remote Workspace documentation.

Try Thinfinity Remote Workspace now!

If you have any questions, please email us at support@cybelesoft.com.

Regards!

The post How to create a Web VPN connection with Thinfinity® Remote Workspace appeared first on Cybele Software, Inc..

Thinfinity® is Designed for a Graphics Intensive Applications

$
0
0
Thinfinity® is Designed for a Graphics Intensive Applications

In this new era of hybrid work, users expect a desktop experience with high-caliber graphic performance capabilities regardless of location. Without a way to service graphics-intensive applications or provide visual clarity to the remote human experience, hybrid work strategies cannot reach their desired and necessary potential.  That’s why Cybele Software’s Engineers set out to fill the expectations gap of remote computing.  The result is our newest version of Thinfinity that ensures remote delivery of GPU heavyweight applications over thousand-mile distances.  

Thinfinity and the H264 Protocol

Thinfinity® has always been known for application publishing and workspace delivery through a modern web browser.

So, how do you deliver HD-like experiences through a remote web browser session?  Without getting too technical, it requires the use of encoders that convert video or large graphic files into a compressed format that are then decompressed by a corresponding decoder on the other end. These encoders and decoders are referred to as codecs. While it is common to find support for BMP, JPG, and PNG coders, Thinfinity® is one of the only application publishing solutions that offers native H.264 capability.  

H.264 is considered the industry standard for video compression. While Thinfinity® utilizes Bitmap codecs by default, H.264 is automatically enabled when needed to deliver high-quality video at very low data rates. The result is a fluid local-like experience for today’s modern-day users, even when utilizing intense GPU applications and processes.

Thinfinity® Delivers the Right Experience

Thinfinity® is ideal for any user that needs an HD-like experience when working remotely. Through its effective employment of the H.264 protocol, digital marketing professionals can work with graphic-intensive applications and file structures to create elaborate presentations, regardless of experience. Engineers and architects can have on-demand access to their cloud-hosted applications using a simple HTML5 web browser while working from any internet-connected device. When it comes to online virtual conferencing, Thinfinity® takes it to the next level, giving salespeople the ability to read the audience in the same manner as if everyone was seated at the same table.

Conclusion

While there was a time when graphic and video performance was reluctantly sacrificed for remote work environments, that is no longer the case thanks to the Thinfinity’s proprietary use of H.264 technology. Find out how Thinfinity® passes the eye test, while also meeting the expected demands of your most stringent users. Seeing is indeed believing, which is why we encourage you to see it for yourself by requesting a free 30-day trial of Thinfinity® yourself. H.264 feature is currently available for Thinfinity Remote Desktop and Thinfinity Remote Workspace.

If you have any questions, please email us at support@cybelesoft.com.


Regards!

The post Thinfinity® is Designed for a Graphics Intensive Applications appeared first on Cybele Software, Inc..

Thinfinity Remote Workspace Online – The Future of Enterprise Mobility

$
0
0
Thinfinity Remote Workspace Online – The Future of Enterprise Mobility

Thinfinity Remote Workspace Online is a cloud-based service that grants you access to remote desktops, virtualized applications as well as intranet web applications through one unified portal.

With Thinfinity Remote Workspace Online, you can give any user access to your business resources and applications in a secure way. With an intuitive user friendly interface, you can easily create, manage and leverage your network assets in a matter of minutes. No need to open ports or firewall rules, since all the connections are tunneled over SSL/TLS protocols.

IT easy: The perfect solution for SMBs moving to a hybrid cloud

Thinfinity Remote Workspace Online is the perfect solution for small businesses and managed service providers looking to move to a hybrid cloud architecture. Implementing Thinfinity Remote Workspace Online doesn’t require the services of an advanced IT specialist—anyone can set it up in minutes, which makes it the perfect solution for small businesses that want to adapt to a hybrid cloud architecture in a way that is practical, secure, and affordable. For Managed Service Providers, Thinfinity Remote Workspace Online is a perfect way to give your customers the flexibility they need to give remote access to internal resources with minimal effort on your part.

Thinfinity Remote Workspace Online fills a growing need for SMBs looking to attain greater agility in a digitally transformed world. As more and more people work remotely, hybrid work is the “new normal” and Thinfinity Remote Workspace Online is the all-in-one solution you need to transform and provide users with all the tools they need to access your desktops and applications from any device, anywhere, anytime.

Simplifying enterprise hybrid cloud deployments

We have built Thinfinity Remote Workspace Online with ease of use in mind, providing the user with a self-service portal which includes an integral set of features, to fully customize and secure their connections.

With Thinfinity Remote Workspace Online you can:

Windows apps icon

Access your Windows apps from any device using a standard browser.

Modernize legacy apps icon

Publish intranet web applications without the need for complex VPN configurations.

File transfer icon

Securely share files with customers or employees.

Mobile access icon

Access remote desktops from mobile devices.

Custome experience icon

Create your own customized portals for each of your customers.

Access manager icon

Easily manage access for your users.

Thinfinity Remote Workspace Online will continue to grow and prosper as a cutting edge solution for virtualization. Its unlimited scalability coupled with ease of use makes it an ideal solution for managing a VDI Platform. Thinfinity is pioneering the way to the future of cloud computing and will be leading the way in thought leadership in this space.

Try Thinfinity Remote Workspace Online for free by visiting online.thinfinity.com

Documentation for the registration and installation process can be found on the following link: https://thinfinity-remote-workspace-online-docs.cybelesoft.com/

Please leave any questions or remarks in the comments section below. We’d love to hear your thoughts!

The post Thinfinity Remote Workspace Online – The Future of Enterprise Mobility appeared first on Cybele Software, Inc..


Cybele Software introduced Thinfinity Remote Workspace Online

$
0
0
Cybele Software introduces Thinfinity Remote Workspace Online, a revolutionary SaaS solution to instantly enable remote and hybrid working

The first SaaS platform for secure and instant remote and in-office team collaboration, Thinfinity Remote Workspace Online is ideal for small organizations, ISVs and SPs. Its unique architecture provides secure access to both internal and external networks without opening any inbound ports ‐ to either your cloud or private network. It can be deployed in a few clicks and requires almost no IT knowledge or resources to install and use.

Wilmington, DE, Mar 17, 2022: Thinfinity Remote Workspace Online is an instant solution which allows you to create digital workspaces for Remote & Hybrid working. Organizations can now publish intranet applications on the fly, giving employees and customers access to all the tools they need to succeed, no matter where they are. It can also deliver Windows Desktop applications through any web browser, provide access to terminal applications and desktops running Unix operating systems, and even remotely access Windows, Mac, and Linux Desktops.

“The in-office work experience isn’t going away, but it is evolving: The Cloud is the new office.” —says Gustavo Ricardi, CEO & Founder of Cybele Software— “Businesses need to find new ways to deliver a better work experience, whether it’s through remote teams or hybrid offices. And it’s not just about productivity—it’s about creating a company culture that makes everyone feel empowered, connected, and engaged with their work and their team. Thinfinity Remote Workspace Online has been designed to simplify this crucial but challenging digital transformation path.” —he adds.

Ideal for small and medium organizations, Thinfinity Remote Workspace Online is a robust and scalable platform to keep teams productive regardless of their location, enabling them to securely work from anywhere while staying compliant with the most restrictive IT security policies.

Independent Software Vendors (ISVs) can also greatly benefit from this new concept. With Thinfinity Remote Workspace Online, they can give customers instant access to free trials and publish their apps as SaaS, empowering their sales team while reducing the time-to-market, boosting their software’s ROI and potentially automating the entire sales process.

With its custom branding options and simplicity of deployment, Thinfinity Remote Workspace Online can also be used by Service Providers to offer their clientele a secure and simple solution for remote browser-based access to their intranet web apps and Windows applications.

“The potential business opportunities are really endless” —says Ricardi— “Thinfinity Remote Workspace Online can be a great solution for organizations and businesses in many different verticals and industries, facilitating their digital transformation.” 

Thinfinity Remote Workspace Online is subscription-based, and can be tried for 30 days for free with no credit card commitment at online.thinfinity.com.


introducing remote workspace online

With Thinfinity Remote Workspace Online, companies can empower their remote team with the tools they need to stay productive from anywhere, on any device.

The post Cybele Software introduced Thinfinity Remote Workspace Online appeared first on Cybele Software, Inc..

Thinfinity® Remote Workspace Secondary Broker (Multi Cloud support): How to install and configure

$
0
0
Thinfinity® Remote Workspace Secondary Broker (Multi Cloud support): How to install and configure

Today we’ll learn how to install and configure a secondary broker. A Secondary Broker is in charge of creating the final server process that connects the user to the remote desktop. These nodes may be used for delivering virtual desktops (running on the public cloud or on premises environments) and balancing the access among single desktops or terminal servers.

To use a secondary broker, which is triggered by a registry key, you will have to install the broker services first and then edit a registry key to change its behavior. Below you will find a step by step on how to configure this:

First of all, execute the Thinfinity Remote Workspace Installer. Accept the License Agreement, and then click on “Next”: 


Select the “Broker and HTML5 Services” option and click on “Next”:


Select the Installation destination folder and click on “Next”:


Now, click on “Install” to install the Thinfinity Remote Workspace components.


How to Enable the Secondary Broker Option.

Open the registry (run: regedit) and search the following directory: HKEY_LOCAL_MACHINE\SOFTWARE\Cybele Software\Thinfinity\Workspace

Double-click on BrokerRole and replace the value primary for secondary.


Configure the Pool, NetworkID, and Gateway

Open the Thinfinity Remote Workspace (Start/ Thinfinity/ Thinfinity Configuration Manager), and configure the required parameters (Pool, NetworkId, and Gateway URL).

Pool: Use this parameter to specify the pool that the secondary broker will use.

Network ID: Use this parameter to specify the Network environment that the secondary broker will use.

Gateway List: Input the URL of the Thinfinity Remote Workspace reverse Gateway. Click on “Add” and complete the URL information. Always specify the security protocol (HTTP/ HTTPS), DNS or IP and the connection port.

 (e.g. https://My_Gateway_DNS:443)

Finally, click on “Apply” to save the changes.

You can click on “Show Log” to verify the status of the connection and ensure it is registering with the reverse Gateway.

Now that we have the secondary broker installed and configured we can continue configuring the primary broker server.
If you missed how to install Thinfinity Remote Workspace, please check the Thinfinity Workspace Administrator’s Guide.

First thing, we need to ensure that the primary broker shares the same NetworkID as the secondary broker, and that both are registered to the same reverse gateway.

Once the above is verified, we can open the primary broker manager to ad

d this pool / secondary broker. In order to do so, start the Thinfinity’s Configuration Manager.

Click add in the “General” tab, below the “Secondary broker” box:

In the ‘Pool Name’ field, enter the name you gave to the pool in the secondary broker and click OK:

Now we will be able to create an ‘Access Profile’ that will start a connection to this pool. 

Remember, you will be able to create ‘RDP’, ‘VNC’ and ‘SSH/Telnet’ connections using this option.

Now, we will show you how to configure an RDP connection. 

Go to the ‘Access Profile’ tab and click ‘Add > RDP’

For this example, we’ll assume we are connecting to ClassRoom ‘A’. So we will just call it “ClassRoom A”.

The computer address/IP will always be localhost (127.0.0.1), given that the connection will end on the secondary broker, we want the connection to be established on that location.

To instruct the profile which secondary broker it has to connect to, we just need to specify the pool name in the ‘Broker Pool’ field, as shown below


Finally, click on ‘OK’ and then ‘Apply’. 

Congratulations, you configured your first secondary broker! Now you should be able to navigate to your Gateway’s URL and test the connection to this newly added pool.

If you have any questions or comments regarding this blog entry, please leave a comment below.


The post Thinfinity® Remote Workspace Secondary Broker (Multi Cloud support): How to install and configure appeared first on Cybele Software, Inc..

How to install Thinfinity® Remote Workspace

$
0
0
How to install Thinfinity Remote Workspace

Thinfinity® Remote Workspace is the first integrated solution to access applications, desktops, data, and any host from a unified portal.

Installing Thinfinity® Remote Workspace for the first time is pretty simple. There are just a few items you have to take into account. Let’s check the installation steps:

First, you’ll need to install it on a machine that will act as an access point to your enterprise resources. To download the installer, please use the following link.


integrated solution for remote access


Then, execute the installer on the target machine.


Read carefully and accept the terms license agreement. 


Next, you will be presented with these options:


All Components

Choose this option if you wish to set up a standalone installation. Both a Thinfinity® Services and Gateway Services installation coexist in the same computer. Also, this installation can work in conjunction with others in a Scaling and Load Balancing scenario.

Broker and HTML5 Services

Choose this option only if you are using a Scaling and Load Balancing scenario. A Thinfinity® Services installation works in conjunction with at least one gateway installation and other Thinfinity® Services installation(s).

Reverse Gateway Only

Choose this option only if you are using a Scaling and Load Balancing scenario. A Gateway Services installation works together with two or more Thinfinity® Services installations

Next, choose the Destination Folder. 


Once the destination folder is properly selected you are ready to begin the install process. Now click on the Install button.


Once the installation process is complete, click finish. 

In order to start configuring Thinfinity Remote Workspace, look for the “Thinfinity® Configuration Manager” located in the Start Menu:


Open the application. The first screen will prompt you to activate the product by following  the corresponding registration method based on your needs. For online activation, your host needs to be connected to an open internet network. Otherwise, an offline activation should be applied instead.


If you wish to try the product out for your initial steps, you can create a new Trial serial number straight from the Product Activation Wizard. Please note, you need to have access to open internet to complete the registration steps for this option.


Fill in with the required registration details. A new fully featured 30-day trial license will be issued for testing and implementation purposes.

For more information on how to install Thinfinity Remote Workspace, please refer to the documentation available on the following link.

Stay tuned for posts on how to setup your first connection. If you have any questions, please leave us a comment!


The post How to install Thinfinity® Remote Workspace appeared first on Cybele Software, Inc..

How to create a Web VPN connection with Thinfinity® Remote Workspace Online

$
0
0
How to create a Web VPN connection with Thinfinity® Remote Workspace Online

Thinfinity® Remote Workspace Online is the first SaaS platform for secure and instant remote and in-office team collaboration. This out-of-the-box solution provides your team with a local-like experience, delivering your apps while securing your architecture with military-grade encryption. One of the benefits of choosing Thinfinity® Remote Workspace Online is the ability to apply a Web VPN connection.

Configuring a Web VPN will provide you instant access to intranet web applications directly from the browser. Enterprise users will be able to securely connect to any web application they use on a day to day basis as if they were sitting at their workstation.

By setting up a Web VPN connection, you can easily provide your users with a shortcut that can be accessible through Thinfinity® Remote Workspace Online’s portal. Users will only be able to connect to a web application without gaining access to your local network. This feature will remove you from the hassle of having to deal with a VPN’s overcomplicated setup.

In order to create a Hybrid Cloud connection via the Thinfinity® Remote Workspace Online’s landing page, follow these steps:


Click on New then select Web VPN as Access Type:


Enter the URL of the Web VPN connection:


Some websites may require additional settings to work with our Web VPN, please verify the following options if they apply for your particular needs.

Main Entry Point
Add the URL you wish to access via Web VPN from outside your network.

Optimize for SPA
Optimizes the connection to better work with Single Page Application, masking the Virtual Path to avoid routing incompatibilities on heavy dependent JavaScript web applications.

Sanitize Input (Prevent XSS)
Applies cross site scripting (XSS) sanitization to every request made to the server to avoid possible XSS issues or attacks.


Set up a name for the Web VPN connection:


Click on Commit to finish setting up the Web VPN connection:


Did you find this post useful? Let us know in the comments!


The post How to create a Web VPN connection with Thinfinity® Remote Workspace Online appeared first on Cybele Software, Inc..

How to configure WebBridge with Thinfinity® Remote Workspace

$
0
0
How to configure WebBridge with Thinfinity® Remote Workspace

With Thinfinity® Remote Workspace we introduced an enhanced method for file transfer. Features like Drag and Drop make the entire process extremely easy and convenient. We simplified the way users interact with their local and remote files, providing the necessary tools for your user’s day to day activities.

To take advantage of all the features, the admin will need to install an executable component called Thinfinity® WebBridge.

WebBridge will enable the ability to Drag and Drop files straight from the browser. This component will also create a temporary Virtual Disk called “ThinDisk” that the users can alternatively use as the main directory to safely and easily transfer files to and from the remote machine.

You’ll find the steps to install Thinfinity® WebBridge below:

  • First-off, download Thinfinity® WebBridge on the server and run the setup “Thinfinity_RDTools_v6.0_Setup_x64” (this distributable is available on request).

Bear in mind, Thinfinity® WebBridge has to be installed on the remote desktop´s machine you wish to upload/download files to/from. The client computer does not require to install any plug-in or add-on.

  • In the first screen, press ‘Next’:

WebBridge will enable the ability to Drag and Drop files straight from the browser


  • Accept the License Agreement and press ‘Next’:


With Thinfinity® Remote Workspace we introduced an enhanced method for file transfer


  • Select the Destination Folder and press ‘Next’:


We simplified the way users interact with their local and remote files


  • Click ‘Install’:


WebBridge: User Experience Transferring files from your local PC to your remote desktop session has never been easier.


  • After the installation completes, press ‘Finish’:


To find out how to use WebBridge, keep reading the "User Experience" section of this article.


Now you should be ready to connect to this server and use the WebBridge drive.


WebBridge: User Experience

Transferring files from your local PC to your remote desktop session has never been easier!

How to upload files:

There are 2 different ways you can upload a file to your remote desktop session:

  • You can drag and drop files directly into the browser where the remote desktop session is running.

After you drag a file into the browser, you will be prompted to save the file:


There are 2 different ways you can upload a file to your remote desktop session:


Select the destination folder you wish to use as the upload location on the remote machine.

  • Go to the “Thinfinity® WebBridge” drive and double click “Upload Here”:


Go to the "Thinfinity® WebBridge" drive and double click "Upload Here":


This will open your local “File Open” dialog, where you can select a file and upload to the “Thinfinity® WebBridge” drive.

  • Finally, you can right-click any folder and select ‘Upload Here’, to upload a file to the selected folder:


This will open your local "File Open" dialog, where you can select a file and upload to the "Thinfinity® WebBridge" drive.

How to Download files:

To download files, there are also 2 different methods:

  • You can drag and drop files into the “Thinfinity® WebBridge” drive. This will save the file in the WebBridge drive and will automatically download from your browser.
  • Right click any file in the remote desktop session, and select “Send to Browser” to automatically download:


You can drag and drop files into the "Thinfinity® WebBridge" drive. This will save the file in the WebBridge drive and will automatically download from your browser.


If you are working on a file that is stored in the “Thinfinity® WebBridge” drive and you update it, WebBridge will detect these changes and download the file again so you don’t lose any of your information.

Did you find this post useful? Let us know in the comments!

The post How to configure WebBridge with Thinfinity® Remote Workspace appeared first on Cybele Software, Inc..

How to Install Thinfinity® Remote Workspace Online

$
0
0
How to Install Thinfinity® Remote Workspace Online

Thinfinity® Remote Workspace Online is the simplest cloud solution for your digital workspace. With Thinfinity® Remote Workspace Online you can start delivering remote access to ALL applications, desktops, and files in just a few minutes. In this guide, we’ll show you how to install it, set up the wizard, and get your network configured.

First off, go to online.thinfinity.com and press ‘Log In’:


remote workspace online web portal

On the next screen, enter your credentials and press ‘Login’.  In case you are not registered yet, go to “Sign up” and create your Account:


remote worskpace login


On Remote Workspace Online landing page, go to the ‘Add Workspace’ button. A Pop-up window is displayed, click on ‘Download the installer’ to proceed:


creating a new workspace


As soon as your download is finished, locate your file and proceed to run it. The installation wizard will wait until the installation process is complete:


running the installer of remote workspace online


Once you open the installer, click on ‘Next’:


installshield wizard for remote workspace


Click on ‘I accept the terms in the license agreement’ then ‘Next’:


license of remote workspace


Next, choose the Destination Folder:


destination folder to install remote workspace


Now click on ‘Install’:


ready to install the program


Now that installation is complete, click on ‘Finish’:


complete installation


Next up, you’ll be prompted to create your first Workspace connection. Here you can select from a range of options such as: Desktop, Application, Web Folder or Terminal. Select and configure the connection type you wish to establish. Note: For the purposes of this article, we’ll be checking the ‘I will set it up later’ option:


create a new connection - workspaces


In this instance, you’re on the final configuration for your workspace connection:


setting up workspace


Hurray! Now your workspace configuration is complete.


workspace set up completed in minutes


Did you find this post useful? Let us know in the comments!

The post How to Install Thinfinity® Remote Workspace Online appeared first on Cybele Software, Inc..

How to create a new RDP connection with Thinfinity Remote Workspace Online

$
0
0
How to create a new RDP connection with Thinfinity® Remote Workspace Online


Some weeks ago, Cybele Software introduced Thinfinity Remote Workspace Online, a secure SaaS solution to instantly enable remote and hybrid working.  This digital workspace platform is ideal for small and medium organizations. It is robust and scalable, so you can keep your teams productive regardless of their location., and provide remote access to ALL applications, desktops and files.

In this guide, we’ll show you how to create new a RDP connection using Thinfinity Remote Workspace Online.

The first step requires you to have your account created at online.thinfinity.com. It’s easy! Just follow the on-screen instructions to complete the installation process.

Once you are on the Thinfinity Remote Workspace Online landing page, click on ‘Access workspace as administrator’, as the picture shows:


thinfinity remote workspace online landing page


  • On the next screen, click on ‘New’:


create new workspace in thinfinity remote workspace online


  • A wizard will guide you through the Access Profile configuration process. For this case scenario, we’ll show you how to set an RDP connection up. As you see, there are many other connection types. Contact our team if you have other connection needs.


create desktop app web folder terminal connection with thinfinity remote workspace online


  • To start, please select the type of connection you wish to create. 


rdp connection thinfinity remote workspace online


  • If you are looking to provide access to your localhost, select ‘This PC’. However, if you wish to connect to a remote resource, select ‘Another PC’. In this sample, we’ll be selecting ‘This PC’. 


set up the connection for thinfinity remote workspace online


  • Next up, teh screen will require that you select which type of authentication mode you want to  use for this connection. By default, it’s set up as ‘Ask for new credentials’. After you select a mode, click on ‘Next’:


authentication for thinfinity remote worskpace online


  • Now, you should specify the profile name for your online RDP connection. By default, the name is set to the destination IP Address, but you can write any descriptive name. Once you are finished setting up the profile name, hit ‘Done’:


profile name for thinfinity remote workspace online


  • Finally, click on ‘Commit’ to finish setting up the Access Profile for your connection:


default ip in thinifinity remote workspace online


Great! Your new web RDP connection is created and accessible through your Thinfinity Remote Workspace Online site!


Thinfinity Solutions

Thinfinity Solutions for remote desktop, screen sharng, digital workspace and application virtualization.

As you already know, Thinfinity Remote Workspace is a remote access, desktop delivery, and app publishing solution. The Online Workspace version allows all the features but releases you from the server-side setup and configuration.

Explore our other remoting and web-enabling solutions, enjoy our free trials, or request a custom demo HERE. No commitment!

We will be happy to assist you and show you our portfolio for remote desktop, screen sharing, digital workspace, and application virtualization.

The post How to create a new RDP connection with Thinfinity Remote Workspace Online appeared first on Cybele Software, Inc..


How to effectively handle interactive Windows sessions with Thinfinity® VirtualUI

$
0
0
How to effectively handle interactive Windows sessions with Thinfinity® VirtualUI

This article will explain in detail and show you how to effectively configure and define interactive Windows sessions for Thinfinity VirtualUI, our development platform that allows you to take any existing Desktop Application and publish it as a web solution.

Thinfinity VirtualUI is compatible and can run on standard Microsoft Windows versions and Microsoft Windows Server editions. Find the list of supported operating systems below:

Operating Systems:

• Microsoft Windows Desktop 8 32­bit / 64­bit
• Microsoft Windows Desktop 10 32­bit / 64­bit
• Microsoft Windows Desktop 11
• Microsoft Windows Server 2012
• Microsoft Windows Server 2012 R2
• Microsoft Windows Server 2016
• Microsoft Windows Server 2019
• Microsoft Windows Server 2022

However, based on the type of operating system you are using, the system services available at your disposal might alter the configuration requirements of your Thinfinity VirtualUI environment.

Microsoft Windows Desktop versions (Windows 11, Windows 10, and Windows 8) support one interactive Windows Session at a time. You can switch interactive sessions using the “Fast User Switch (FUS)” feature, leaving one session disconnected while accessing another one using the same user.

In contrast, Microsoft Windows Server provides -by default- two interactive administrative sessions, available from a console and RDP at the same time. This factor will determine the main difference between the available modes when configuring Thinfinity VirtualUI sessions.

Thinfinity VirtualUI requires at least one interactive Windows Session. By default, it uses the console session*, sharing this session among all connected users.

You can also run Thinfinity VirtualUI under an alternate Windows session by configuring one session per user or evenly distributing users among several Windows sessions.

*The console session is what you see when you look at a monitor that’s plugged into the server. Normally with RDP you get your own session that is not the same as what’s shown on the server’s own monitor.

Shared Windows Session

By default, Thinfinity VirtualUI comes with the Shared Windows Session option selected. VirtualUI uses the console session to establish all connections under the same session.


shared windows sessions with Thinfinity VirtualUI


This mode is particularly useful for Microsoft Windows Desktop users looking to use the single console session available at their disposal. It is also very convenient for integration and testing phases, which will allow several users to connect and perform all the necessary tests on the integrated application. All application instances will be generated under the same user session while simultaneously retaining an active connection to the developer or administrator session. The developer can troubleshoot or check logs while the users use the integrated application through the web browser.

Note: Based on the available system resources, application requirements, and the number of concurrent users, performance on this mode can be slightly degraded. If you are experiencing issues, we strongly suggest switching to One Browser per Session mode.

One Browser per Session

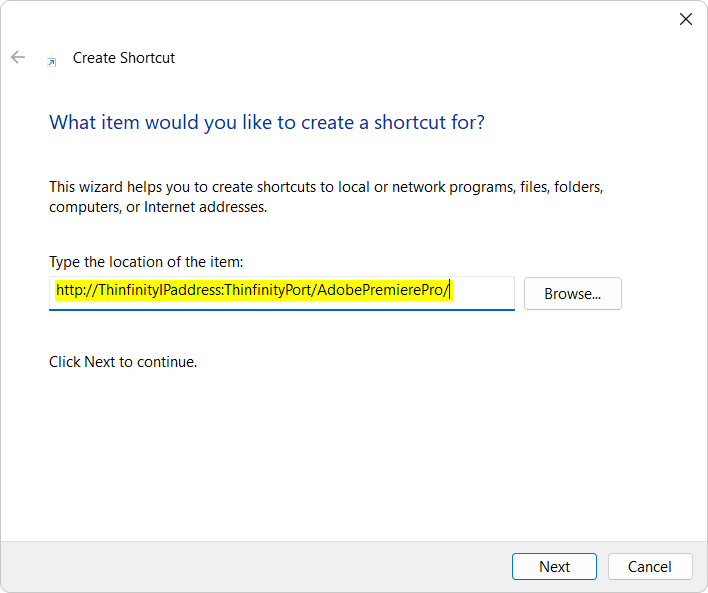
This option allows executions on the integrated application under individual Windows Sessions. Thinfinity VirtualUI allows selecting a specific user administrator account responsible for executing a session each time there is a connection attempt.

Here lies the main difference between Microsoft Windows versions in use. As previously mentioned, the number of interactive sessions available will be a determining factor that influences the way Thinfinity VirtualUI works on each operating system.


shared windows sessions with Thinfinity VirtualUI


Microsoft Windows Desktop

By default, Microsoft Windows Desktop comes with one interactive session. Only one session can be active simultaneously; thus, all new connections attempted under the same user account will disconnect existing sessions.

In a testing scenario, developers like to keep their sessions active. Active sessions are beneficial for reviewing logs or troubleshooting purposes. However, new connection attempts from remote users might temporarily disconnect the developer’s session.


Microsoft Windows Server

The One browser per session option works great with Microsoft Windows Server. This Windows version, by default, comes with two interactive sessions allowing for simultaneous remote and local connections. Developers/administrators can retain connectivity to the server while users remotely connect to the integrated application.

We strongly recommend using Thinfinity VirtualUI in conjunction with Microsoft Windows Server edition for Production environments. This additional RDS session provides more flexibility and improves performance for developers and users alike.

If you would like to learn more about Sessions on VirtualUI, you can also check our documentation.

Please leave any questions or remarks in the comments section below. We’d love to hear your thoughts!


The post How to effectively handle interactive Windows sessions with Thinfinity® VirtualUI appeared first on Cybele Software, Inc..

Application Virtualization: deliver any application in the browser with Thinfinity Remote Workspace

$
0
0

Application Virtualization: deliver any app in the browser with Thinfinity Remote Workspace

The need for application virtualization has grown during the past two years, and it demands quick but solid workarounds.

We will take advantage of Microsoft RemoteApp, which allows users to see and interact with a single application and not the entire desktop, and we will virtualize this application with Thifnity Remote Workspace.

In this way, the users will be able to access the remote app we’ve published using any web browser, just as if they were running it on their local device. 

As you will see in this guide, there’s no need to have any programming skills or make modifications to the Windows application source code to accomplish it. The only requisite is to previously install Windows Server with Remote Desktop Services.

We recommend checking your environment before you start following this tutorial, ad we will be happy to help if you need assistance on this particular. Contact our tech team for further guidance.


STEP BY STEP GUIDE:

  1. First, you need to open the Thinfinity® Configuration Manager:


Application virtualization software

2. Then, click on the ‘Access Profiles’ tab, and press ‘Add’. For this guide, we’ll be creating an ‘RDP connection:


Creating an ‘RDP’ connection:


3. Configure the Access Profile with a ‘Name’, then on ‘Computer’ enter the IP Address or domain name of the server, and on ‘Credentials’ enter the Windows credentials to authenticate to said server:


Authenticate to said server


  • For testing purposes, check the ‘Allow anonymous access’ option:


For testing purposes, check the ‘Allow anonymous access’ option


  • Under the ‘Program’ tab, choose the ‘Execute as RemoteApp’ option. 


Then, point both the ‘Program path and the filename’ and ‘Start in the following folder’ fields to the executable’s directory and its root folder, respectively. 

You can also pass arguments to your application in the “Arguments” field:


You can also pass arguments to your application in the “Arguments” field:


  • For testing purposes, mark the check-box for ‘Allow anonymous access’ under the ‘Authentication’ tab:


For testing purposes, check-box for ‘Allow anonymous access’


  • Press ‘Apply’:


Apply option of the Thinfinity Configuration Manager


  • You can open the published application by going to http://127.0.0.1:Port and clicking on the newly created Profile:


Open the published application Thinfinity Configuration Manager


  • If you start multiple RemoteApps, you’ll find a dock menu at the bottom of the browser screen, this allows you to toggle between different applications of the same connection.

You can also resize the App’s windows and be able to see more than one at the same time.

You can also pin this menu to be always on top or unpin it to automatically hide it.

Running gpedit.msc


If you get an access denied error, you would need to enable a group policy to allow unlisted programs to be started. To this end, open the ‘Group Policy Editor’ by going to ‘Start > Run > gpedit.msc’:


Running gpedit.msc


  • On the ‘Group Policy Editor’ navigate to: 

Computer Configuration > Administrative Templates > Windows Components > Remote Desktop Services > Remote Desktop Session Host > Connections > Allow users to connect remotely by using Remote Desktop Services


Allow users to connect remotely by using Remote Desktop Services


  • Double click on this policy and then click on the check-box next to ‘Enabled’:


Enabled remote connection


  • Afterwards, you’ll have to update the group policies. In order to do this, call ‘gpupdate /force’ from a ‘Command Prompt’ window elevated as an Administrator:


First step for publish any Windows application to the web with Thinfinity Remote Desktop


  • If you want to give your users quick access to your applications, you can create a desktop shortcut to the URL of VirtualUI with the Virtual Path of the application. Here’s an example:


What item would you like to create a shortcut for? - Thinfinity Remote Desktop


  • To ensure these changes are applied, you can go to ‘Start > Run > services.msc’ and restart the ‘Thinfinity Service Manager’:


To ensure these changes are applied, you can go to ‘Start > Run > services.msc’ and restart the ‘Thinfinity Service Manager’:


  • You can check our live demo and experience this feature yourself. You will be able to test this feature with the following Profiles:
    • Desktop
    • Notepad
    • Paint


Thinfinity Solutions for remote desktop, screen sharng, digital workspace and application virtualization.

Thinfinity Solutions

As you already know, Thinfinity VirtualUI is a web-enabling SDK to run apps on a browser without rewriting the code. On the other hand, Thinfinity Remote Desktop is a remote access, desktop delivery and app publishing solution.

Explore our remoting and web-enabling solutions, enjoy our free trials, or request a custom demo HERE. No commitment!

We will be happy to assist you and show you our portfolio for remote desktop, screen sharing, digital workspace, and application virtualization.

The post Application Virtualization: deliver any application in the browser with Thinfinity Remote Workspace appeared first on Cybele Software, Inc..

Publish Adobe Premiere Pro to the web with Thinfinity Remote Workspace

$
0
0
How to publish Adobe Premiere Pro to the web with Thinfinity Remote Workspace

When it comes to video editing software, Adobe Premiere Pro is a top choice for professionals, teachers and students. Still, not all devices have the necessary hardware requirements to run it. Learn how you can solve this by publishing it as a RemoteApp with Thinfinity® Remote Workspace.

Adobe Premiere Pro is one of the most renowned video editing platforms in the world. However, not all PCs can meet its high-performance requirements. In addition, educational institutions may not have the budget to get the number of licenses or devices they would need to offer it to their students.

This challenge -as complex as it seems- can be solved by publishing a RemoteApp with Thinfinity Remote Workspace, our all-in-one solution for application and desktop delivery. With Thinfinity Remote Workspace, you can publish Premiere Pro to the web in just a few minutes.

What is a RemoteApp?

RemoteApp is a feature of Microsoft’s Remote Desktop Services that allows individual programs to run remotely using a Remote Desktop Client. Instead of accessing the entire remote desktop, RemoteApp allows users to see and interact with just the application as if they were running on the end-user’s device.

You don’t need to have any programming skills or make any modification to the Windows application source code to accomplish it.

How to publish a RemoteApp with Thinfinity Remote Workspace?

Thinfinity Remote Workspace is the first integrated solution to access applications, desktops, data, from a unified portal. With Thinfinity Remote Workspace, you can enable remote access to ALL your apps, desktops, and files on any device.

Installing it for the first time is pretty simple. There are just a few items you have to take into account. You can check the Thinfinity Remote Workspace’s installation steps here.

Once you complete the installation process, open the Thinfinity® Configuration Manager:


publish premiere pro on web 13


Click on the ‘Access Profiles’ tab, and press ‘Add’. For this guide, we’ll be creating an ‘RDP’ connection:


publish premiere pro on web 11


Configure the Access Profile with a ‘Name’, then on ‘Computer’ enter the IP Address or domain name of the server, and on ‘Credentials’ enter the Windows credentials to authenticate to said server:


publish premiere pro on web 5


For testing purposes, check the ‘Allow anonymous access’ option:


publish premiere pro on web 4


Under the ‘Program’ tab, choose the ‘Execute as RemoteApp’ option.

Then, point both the ‘Program path and the filename’ and ‘Start in the following folder’ fields to the executable’s directory and its root folder, respectively.

You can also pass arguments to your application in the “Arguments” field:


publish premiere pro on web 1


For testing purposes, mark the check-box for ‘Allow anonymous access’ under the ‘Authentication’ tab:


publish premiere pro on web 7


Press ‘Apply’:


publish premiere pro on web 12


You can open the published application by going to http://127.0.0.1:Port and clicking on the newly created Profile:


publish premiere pro on web 16


You can now use Adobe Premiere Pro on a browser via the RemoteApp functionality for Thinfinity Remote Workspace!


publish premiere pro on web 15

If you get an access denied error, you would need to enable a group policy to allow unlisted programs to be started. To this end, open the ‘Group Policy Editor’ by going to ‘Start > Run > gpedit.msc’:


publish premiere pro on web 9


On the ‘Group Policy Editor’ navigate to:
‘Computer Configuration > Administrative Templates > Windows Components > Remote Desktop Services > Remote Desktop Session Host > Connections > Allow users to connect remotely by using Remote Desktop Services’


publish premiere pro on web 8


Double click on this policy and then click on the check-box next to ‘Enabled’:


publish premiere pro on web 6


Afterwards, you’ll have to update the group policies. In order to do this, call ‘gpupdate /force’ from a ‘Command Prompt’ window elevated as an Administrator:


publish premiere pro on web 3


If you want to give your users quick access to Adobe Premiere Pro, you can create a desktop shortcut to the URL of Remote Workspace with the Virtual Path of the application. Here’s an example:


publish premiere pro on web 2


To ensure these changes are applied, you can go to ‘Start > Run > services.msc’ and restart the ‘Thinfinity Service Manager’:


publish premiere pro on web 10

Enabling high-quality performance

H264 is the most commonly used format for recording, compression, and distribution of high-quality video content in an efficient manner. As such, Thinfinity Remote Workspace must work in conjunction with H264 in order to provide a professional experience. To activate H264 for Thinfinity, check this step-by-step article.

Did you find this post useful? Let us know in the comments!

The post Publish Adobe Premiere Pro to the web with Thinfinity Remote Workspace appeared first on Cybele Software, Inc..

How to enable H264 for Thinfinity Remote Workspace

$
0
0
How to enable H264 for Thinfinity Remote Workspace

H264 is the most commonly used format for recording, compression, and distribution of high-quality video content in an efficient manner. As such, Thinfinity® Remote Workspace must work with H264 to provide a professional experience for your remote apps and desktops. To activate H264 for Thinfinity, check this step-by-step article.

H264 is a video compression standard capable of providing good video quality at substantially lower bit rates than previous standards without increasing design complexity so much that it would be impractical or costly to implement.

To set H264 up for Thinfinity Remote Workspace our solution to deliver remote access to all your applications, desktops, and files You need to enable this setting on the Remote Host where you wish to connect.

This article will guide you through how to accomplish this in just a few steps. First, check the Thinfinity Remote Workspace’s installation steps and complete the instructions.

Next, start by opening the Thinfinity Remote Workspace Configuration Manager and go to the Access Profiles tab. Then select the profile you wish to have the H264 feature enabled and click ‘Edit’:


How to enable H264 - Step 7


In the Profile Editor of your connection, go to the ‘Experience’ tab and then check the box next to ‘H264’ to enable it. Then click ‘Ok’ and ‘Apply’ the changes on the Configuration Manager:


How to enable H264 - Step 2


Next up, you need to activate this feature at an operating system level, open the Local Group Policy editor: click Start, then type Edit group policy:


How to enable H264 - Step 3


Once on the Group Policy Editor, navigate to this path:

‘Computer Configuration > Administrative Templates > Windows Components > Remote Desktop Services > Remote Desktop Session Host > Remote Desktop Session Environment’

You will have to enable these three policies:

‘Prioritize H.264/AVC 444 graphic mode for Remote Desktop Connections’

‘Configure H.264/AVC hardware encoding for Remote Desktop Connections’

‘Use hardware graphics adapters for all remote desktop sessions’


How to enable H264 - Step 4


To this end, you would need to right-click on each of them, one at a time, and select ‘Edit’:


How to enable H264 - Step 5


Once you’ve opened a policy window, check the circle next to ‘Enabled’ and then hit ‘Apply’ then ‘OK’. Repeat this process for all the policies shown above:


How to enable H264 - Step 6


Afterwards, you would need to open a ‘Command Prompt’ window elevated as Administrator to update the changes made to policies:


How to enable H264 - Step 7


Here you would need to type ‘gpupdate /force’ to finish applying the policies:


How to enable H264 - Step 8


You’re good to go! Now you can deliver desktops, GPU applications, and files with high-quality performance for any device.


publish premiere pro on web 16


Publishing GPU apps to the web with Thinfinity Remote Workspace:

GPU applications are core to many educational programs. However, not all PCs have the necessary hardware to run them correctly. Some of your students may even want to access these applications from other devices, such as Chromebooks. Learn how you can solve this challenge by publishing your GPU applications as RemoteApps with Thinfinity® Remote Workspace.


publish premiere pro on web 15


Did you find this post useful? Let us know in the comments!

The post How to enable H264 for Thinfinity Remote Workspace appeared first on Sitio development - Cybele Software, Inc..

Publish AutoCAD to the web with Thinfinity Remote Workspace

$
0
0
How to publish AutoCAD to the web with Thinfinity Remote Workspace

AutoCAD is one of the most used programs by architects,  industrial designers and students in order to design their projects. At the same time, its license costs make it an expensive option for many educational programs. Learn how you can solve this by publishing it as a RemoteApp with Thinfinity® Remote Workspace.

AutoCAD is a software widely used by architects, engineers, industrial designers and students. Although there is a Web App version of AutoCAD, it does not have all the functionalities of the Desktop version. At the same time, due to its high licenses costs, it may be too expensive to offer it to large number of professors and students.

This challenge -as complex as it seems- can be solved by publishing a RemoteApp with Thinfinity Remote Workspace, our all-in-one solution for application and desktop delivery. With Thinfinity Remote Workspace, you can publish AutoCAD to the web in just a few minutes.

What is a RemoteApp?

RemoteApp is a feature of Microsoft’s Remote Desktop Services that allows individual programs to run remotely using a Remote Desktop Client. Instead of accessing the entire remote desktop, RemoteApp allows users to see and interact with just the application as if they were running on the end-user’s device.

You don’t need to have any programming skills or make any modification to the Windows application source code to accomplish it.

How to publish a RemoteApp with Thinfinity Remote Workspace?

Thinfinity Remote Workspace is the first integrated solution to access applications, desktops, data, from a unified portal. With Thinfinity Remote Workspace, you can enable remote access to ALL your apps, desktops, and files on any device.

Installing it for the first time is pretty simple. There are just a few items you have to take into account. You can check the Thinfinity Remote Workspace’s installation steps here.

Once you complete the installation process, open the Thinfinity® Configuration Manager:


publish premiere pro on web 13


Click on the ‘Access Profiles’ tab, and press ‘Add’. For this guide, we’ll be creating an ‘RDP’ connection:


publish premiere pro on web 11


Configure the Access Profile with a ‘Name’, then on ‘Computer’ enter the IP Address or domain name of the server, and on ‘Credentials’ enter the Windows credentials to authenticate to said server:


Web AutoCAD with Thinfinity Remote Workspace 1


For testing purposes, check the ‘Allow anonymous access’ option:


Web AutoCAD with Thinfinity Remote Workspace 2


Under the ‘Program’ tab, choose the ‘Execute as RemoteApp’ option.

Then, point both the ‘Program path and the filename’ and ‘Start in the following folder’ fields to the executable’s directory and its root folder, respectively.

You can also pass arguments to your application in the “Arguments” field:


Web AutoCAD with Thinfinity Remote Workspace 3


For testing purposes, mark the check-box for ‘Allow anonymous access’ under the ‘Authentication’ tab:


publish premiere pro on web 7


Press ‘Apply’:


Web AutoCAD with Thinfinity Remote Workspace 4


You can open the published application by going to http://127.0.0.1:Port and clicking on the newly created Profile:


Web AutoCAD with Thinfinity Remote Workspace 5


You can now use  AutoCAD on a browser via the RemoteApp functionality for Thinfinity Remote Workspace!


Web AutoCAD with Thinfinity Remote Workspace 6

If you get an access denied error, you would need to enable a group policy to allow unlisted programs to be started. To this end, open the ‘Group Policy Editor’ by going to ‘Start > Run > gpedit.msc’:


publish premiere pro on web 9


On the ‘Group Policy Editor’ navigate to:
‘Computer Configuration > Administrative Templates > Windows Components > Remote Desktop Services > Remote Desktop Session Host > Connections > Allow users to connect remotely by using Remote Desktop Services’


publish premiere pro on web 8


Double click on this policy and then click on the check-box next to ‘Enabled’:


publish premiere pro on web 6


Afterwards, you’ll have to update the group policies. In order to do this, call ‘gpupdate /force’ from a ‘Command Prompt’ window elevated as an Administrator:


publish premiere pro on web 3


If you want to give your users quick access to AutoCAD, you can create a desktop shortcut to the URL of Remote Workspace with the Virtual Path of the application. Here’s an example:


Web AutoCAD with Thinfinity Remote Workspace 7

To ensure these changes are applied, you can go to ‘Start > Run > services.msc’ and restart the ‘Thinfinity Service Manager’:


publish premiere pro on web 10

Enabling high-quality performance

H264 is the most commonly used format for recording, compression, and distribution of high-quality resolution content in an efficient manner. As such, Thinfinity Remote Workspace must work in conjunction with H264 in order to provide a professional experience. To activate H264 for Thinfinity, check this step-by-step article.

Did you find this post useful? Let us know in the comments!

The post Publish AutoCAD to the web with Thinfinity Remote Workspace appeared first on Cybele Software, Inc..

Viewing all 101 articles
Browse latest View live