Quantcast
Channel: C# Archives - Blog Cybele Software, Inc.
Viewing all 101 articles
Browse latest View live

Monitor remote access sessions with Thinfinity Remote Workspace analytics

$
0
0

One of the multiple improvements of Thinfinity® Remote Workspace v6.0, is that you can monitor remote access sessions easier than ever.

This tutorial will guide you to configure the remote access Analytics with Microsoft SQL Server.

Before setting up this monitoring tool, it is mandatory to have installed Microsoft SQL Server 2012 or later (the Express edition is also supported).

Once MS SQL Server is configured, the next step is setting up Thinfinity® Remote Workspace v6.0 or superior to retrieve the stored data.

In order to do that, open the Configuration Manager and click on the ‘Permissions’ tab and then click the ‘Analytics’ button located below the ‘Users and Groups’ section:


Monitor remote access sessions with Thinfinity, step 01

The ‘Analytics Database Options’ windows is displayed:


Monitor remote access sessions with Thinfinity, step 02

Check the tick-box adjacent to ‘Microsoft SQL Server’ to enable the configuration fields:


Monitor remote access sessions with Thinfinity, step 03


For ‘Provider’, select ‘SQLOLEDB’ (comes by default):

Monitor remote access sessions with Thinfinity, step 04

Into the fields ‘Server/Instance’ and ‘Database Name’, type the values corresponding to your SSMS configuration (‘ThinfinityAnalytics’ comes by default):


Monitor remote access sessions with Thinfinity, step 05


Click on ‘Use Windows NT Integrated Security’ to use an AD user, or click ‘Use MSSQL credentials’ to use an SQL user.


Monitor remote access sessions with Thinfinity, step 06


To check that all the information provided so far is properly configured, click on ‘Test connection’:

Monitor remote access sessions with Thinfinity, step 07

The confirmation alert let us know that everything’s set correctly. Any other message will include information regarding the possible error in order to correct it.


Monitor remote access sessions with Thinfinity, step 08


Click on ‘Yes’ to close it, then on ‘OK’ to complete the configuration process:


Monitor remote access sessions with Thinfinity, step 09


The last step is clicking on ‘Apply’ on the ‘Permissions’ tab to save the configuration:


Monitor remote access sessions with Thinfinity, step 10


Once Analytics is configured, the next step is assigning permissions to Users or Groups to access the Analytics.

Let’s start opening Thinfinity® Remote Workspace v6.0, then selecting the ‘Permissions’ tab and click on ‘Add’ below the ‘Users and Groups’ section and select an AD User or Group, then click ‘OK’:


Monitor remote access sessions with Thinfinity, step 11

The selected User/Group is now on the list, now click on it and the ‘Permissions’ section will be enabled to be configured:


Monitor remote access sessions with Thinfinity, step 12


Click the ‘User access to Analytics’ check-box, then click on ‘Apply’.

Now the User/Group who was given permission to Analytics, will be able to access the data once logged in.


Regards!


Thinfinity Solutions for remote desktop, screen sharng, digital workspace and application virtualization.

Thinfinity Solutions

As you already know, Thinfinity Remote Desktop is a remote access, desktop delivery, and app publishing solution.

Explore our other remoting and web-enabling solutions, enjoy our free trials, or request a custom demo HERE. No commitment!

We will be happy to assist you and show you our portfolio for remote desktop, screen sharing, digital workspace, and application virtualization.

The post Monitor remote access sessions with Thinfinity Remote Workspace analytics appeared first on Cybele Software, Inc..


How to Use Permissions to restrict available Resources Per user

$
0
0

Did you know that you are able to make users of Thinfinity Remote Workspace see only their respective computers, rather than the whole list that they would normally see otherwise?

As you probably already know, you can install Thinfinity Remote Workspace server in multiple different environments or architectures, but either if you are providing access to a fully virtualized environment, a pool of VM’s or if you are using Thinfinity Remote Workspace Server to access Physical resources in your office, you can set user profiles to show each user only the resources that they need to access.


Use permissions to restrict available resources per user, step 01


In order to accomplish this, you would need to create an access profile per user. To do this, please follow these steps:


1. Open Remote Desktop Server Manager, and on the “Access Profiles” tab click on “Add” > “RDP” like so:


"/

2. On the “General” tab of the Access Profile, enter the IP address or domain of the computer to which you wish the user to connect to. And also check the “Use these credentials” option, where you’ll be able to specify the intended user:


Use permissions to restrict available resources per user, step 03


3. Next, go to the “Permissions” tab and uncheck “Allow anonymous access”. Then, click on “Add” and type the user intended for this connection


Use permissions to restrict available resources per user, step 04

4. And finally, if you want to add another layer of security, you may go to the “Restrictions” tab, where you are able to select the “Allow only from these IPs” option and then click on “Add” to establish the IP address of the user it’s the only one able to connect to this server:


Use permissions to restrict available resources per user, step 05

This diagram would quickly sum up the kind of environment that this setup would entail:


Use permissions to restrict available resources per user, step 06

Should you have any questions, contact us at support@cybelesoft.com or leave a message on this same post.


Regards!

The post How to Use Permissions to restrict available Resources Per user appeared first on Cybele Software, Inc..

How to create and manage labels on Thinfinity® Remote Workspace

$
0
0

In this article, we will show you how to create and manage labels on Thinfinity Remote Workspace. The labels are very useful and will help you in different ways:

Labels work in an organizational way, so you can manage your different profiles if needed.

You can create labels in the Configuration Manager and also through the Thinfinity Remote Workspace landing page.

Admin created Labels:

To create labels with the Manager, just follow these steps

1. Open the Configuration Manager

2. Go to the “Access Profiles” tab and click on “Add”


Create and manage labels on Thinfinity Remote Workspace, step 01

3. Select “label” from the drop-down menu.

4. A new window will pop up. There you can name your label and pick a color for it.

5. After this, click “ok” and then “apply”.


Create and manage labels on Thinfinity Remote Workspace, step 02

6. Your label is created. You will be able to add profiles and other labels to Thinfinity Remote Workspace.


User created Labels:

You can also create labels from the Thinfinity Remote Workspace landing page:
1. Sign in
2. Click the “+” button


Create and manage labels on Thinfinity Remote Workspace, step 03


3. This will open the “Edit label” tab, where you can name the label and select a color for it.


Create and manage labels on Thinfinity Remote Workspace, step 04


4. Once completed, the label will be added to the main menu.

5. By clicking on the label, you will be able to create RDP profiles and other labels, which can also have their own labels and profiles within.


Create and manage labels on Thinfinity Remote Workspace, step 05

6. There’s a view option that you may find much more comfortable. It allows you to see the labels you have created and the labels within them.

7. Click on the button of the image below to access it.


Create and manage labels on Thinfinity Remote Workspace, step 06


8. There you will find the option “home” and when you click it, a list will open all the labels. Click on any label to expand the menu and see its child labels. To see the contents of a given label, just click on it.


Create and manage labels on Thinfinity Remote Workspace, step 07


9. The menu shows icons by default, but you can either display smaller icons or a list view, where you can see the name of the profile, the labels created and the connection type.

Now you know how to create and manage labels in Thinfinity Remote Workspace.


If you have any questions, please email us at support@cybelesoft.com.


Regards!


Thinfinity Solutions for remote desktop, screen sharng, digital workspace and application virtualization.

Thinfinity Solutions

As you already know, Thinfinity Remote Desktop is a remote access, desktop delivery, and app publishing solution.

Explore our other remoting and web-enabling solutions, enjoy our free trials, or request a custom demo HERE. No commitment!

We will be happy to assist you and show you our portfolio for remote desktop, screen sharing, digital workspace, and application virtualization.

The post How to create and manage labels on Thinfinity® Remote Workspace appeared first on Cybele Software, Inc..

How to configure One-Time URL in Thinfinity Remote Workspace

$
0
0

Thinfinity Remote Workspace includes a very powerful tool that allows you to create 1-time disposable links. These links can be used to do integrations of all kinds.
The following are just some examples of what you can accomplish using OT URL:

– Automate connections: Securely start RemoteApps
– Protect your environment by using one-time disposable links
– Embed an RDP connection into a public web page
– Start a connection to a remote application with different parameters.

Thinfinity Remote Workspace, offers a mechanism to generate One-Time-URL connections that expire after a given period of time.

The One-Time-URL feature is designed to work with the Access Profiles and User/Password Security Levels.

How to configure One-Time URL

You have to configure an ApiKey on the Configuration Manager Server in order to use this method.

These are some situations in which the One-Time-URL might be useful:

  1. Giving access to a desktop to external users without having to weaken the Security level to None.
  2. Generating temporary access to a desktop.
  3. Integrating the Configuration Manager on a Single-Sign-On Scheme along with external applications.

How it works:

  1. First, you need to ask Thinfinity® Remote Workspace to generate the URL for you. Call Thinfinity® Remote Workspace server following this URL format:

http(s)://HTTP finityRDP:Port/ws/oturl/get?

  1. The queryString should be built with all parameters listed below:

apikey= &apiuser= &model= &plen= &expires=

Find on the table below a description for each required parameter:

Configure One-time URL in Thinfinity Remote Workspace, step 01

On the next topics, you can find out other parameters you can use to Configure the connection and Enable features.

  1. If Thinfinity Remote Workspace gets to authenticate with the parameters sent on the queryString, it will return a One-Time-URL that will allow you to establish an RDP connection with the remote desktop.

/oturl.html?key=w7NJNschBdJD9e6G6luWhOCalM$oFW7guqC6jE1IQah3AJm3&pass=BOWZB8FG

Concatenate the Thinfinity Remote Workspace address to the generated URL, following this format below:

http(s)://THTTPinityRDP:Port/oturl.html?key=w7HTMLchBdJD9e6G6luWhOCalM$oFW7guqC6jE1IQah3AJm3&pass=BOWZB8FG

This way, the URL will be ready to be used. You can redirect your application to the desktop connection through it, or even send it to an external user by email.

You will find an HTML/ajax example inside the application installation directory, under the ‘webrdp’ folder. The file is named oturltest.html and implements the features covered on this topic.

In conclusion, One-Time URL offers a useful way to extend web-enhanced applications to new scenarios. We are fully convinced that you will greatly benefit from this Thinfinity Remote Workspace feature.

Have any questions? Contact us at support@cybelesoft.com or leave a message on this same post.


Regards!

The post How to configure One-Time URL in Thinfinity Remote Workspace appeared first on Cybele Software, Inc..

Restrict User Logon Hours (Thinfinity Remote Workspace)

$
0
0

Limit remote access to work hours only

Many users reported the need to restrict user logon hours, so we have great news for you!

One of the new beta features on the latest Thinfinity Remote Workspace build, is that you can select which days of the week and hours of the day a user can use one of your connections. This possibility to customize the access profile, even more, gives you deep control over your environment’s security.

Not sure if you run the latest build? Contact us or go to the download page to get it.

To implement it, just go to the Access Profiles tab on the Configuration Manager, select the Access Profile that you want to modify, and click on Edit:


Restrict user logon hours, step 01


On the Access Hours tab, you will see the calendar of availability for your server. On blue will be shown when the server can be accessed by those that have permissions.


Restrict user logon hours, step 02


To limit the access, select Access Denied, click and drag the mouse pointer on the hours that you want to reject connections.


Restrict user logon hours, step 03


Once you are done, click on Ok, then, on Apply, and you are ready to go.

Not a Thinfinity user yet? Read more and download it here.

Have any questions? Contact us to get a quick live demo at support@cybelesoft.com or leave a message on this same post.


Regards!

The post Restrict User Logon Hours (Thinfinity Remote Workspace) appeared first on Cybele Software, Inc..

Secondary Broker: How to install and configure (Thinfinity Remote Workspace)

$
0
0

The secondary broker is triggered by a registry key. You will have to install the broker services first and then edit a registry key to change its behavior. Below you will find a step by step on how to configure this:

Execute Thinfinity Remote Workspace Installer. Accept the License Agreement, then click on next:


Install and configure secondary broker, step 01

Select the “Broker and HTML5 Services” option and click on next.


Install and configure secondary broker, step 02

Select the Installation destination folder and click on next.


Install and configure secondary broker, step 03

Now, click on “Install” to install the Thinfinity Remote Workspace components.


Install and configure secondary broker, step 04

How to Enable Secondary Broker Option.

Open the registry (run: regedit) and search the following directory: Computer\HKEY_LOCAL_MACHINE\SOFTWARE\Cybele Software\Thinfinity\Workspace.

Double-click on BrokerRole and replace the value primary for secondary.

Install and configure secondary broker, step 05

Configure Pool, NetworkID, and Gateway

Open the Configuration Manager, and configure the required parameters, Pool, NetworkId, and Gateway URL.


Install and configure secondary broker, step 06

Pool: Use this parameter to specify the pool the secondary broker will use.

Network ID: Use this parameter to specify the Network environment that the secondary broker will use.

Gateway List: Input the URL of the Thinfinity Remote Desktop Gateway. Click on “Add” and complete the URL information. Always specify the security protocol (HTTP/ HTTPS) and the connection port.

 (e.g. https://My_Gateway_DNS:443)

Finally, click on Apply to save the changes.

You can click on “Show Log” to verify the status of the connection.
 

Have any questions?

Book a call today to learn more about how Thinfinity can help your organization. We are always available to guide you and provide the best solution based on your specific needs.

Recent posts

The post Secondary Broker: How to install and configure (Thinfinity Remote Workspace) appeared first on Cybele Software, Inc..

How to configure Load Balancing in Thinfinity Remote Workspace v6.0

$
0
0

In this article, we’ll briefly describe how to configure the release of Thinfinity Remote Workspace v6.0’s components to work in a Load Balancing environment.

First, we’ll install the gateway component on our Gateway Server, and then our broker component on our Broker Server.


Gateway Server

Open the Thinfinity Remote Workspace installer. Click on Next:


Configure load balancing in Thinfinity Remote Workspace v6.0, step 01


Select ‘I accept the terms in the license agreement’ and click on Next:


Configure load balancing in Thinfinity Remote Workspace v6.0, step 02

Select ‘Reverse Gateway Only’ and click on Next:


Configure load balancing in Thinfinity Remote Workspace v6.0, step 03

Choose a destination folder and click on Next:


Configure load balancing in Thinfinity Remote Workspace v6.0, step 04

Now that everything is configured, click on ‘Install’:

Configure load balancing in Thinfinity Remote Workspace v6.0, step 05

Broker Server

Open the Thinfinity Remote Workspace installer. Click on Next:


Configure load balancing in Thinfinity Remote Workspace v6.0, step 06

Select ‘I accept the terms in the license agreement’ and click on Next:


Configure load balancing in Thinfinity Remote Workspace v6.0, step 07


Select ‘Broker and HTML5 Services’ and click on Next:


Configure load balancing in Thinfinity Remote Workspace v6.0, step 08

Choose a destination folder and click on Next:


Configure load balancing in Thinfinity Remote Workspace v6.0, step 09


Now that everything is configured, click on ‘Install’:


Configure load balancing in Thinfinity Remote Workspace v6.0, step 10


To guarantee that the load balancing configuration performs properly, these are the main configuration items we that we should look for:

  • The Network ID.
  • IP Bindings (in the Gateway Manager).
  • The Gateway URL (in the Broker Server).


The Network ID

The ‘Network ID’ must be the same across all gateway(s) and broker(s) components.

You can modify the Network ID to any value, since it doesn’t follow a specific format.


Configure load balancing in Thinfinity Remote Workspace v6.0, step 11

Configure load balancing in Thinfinity Remote Workspace v6.0, step 12

IP Bindings

In the General tab, we will configure the Port and Bindings for the user (browser client) to reach Thinfinity Remote Workspace. You can do so by selecting the default connection and click edit. For instance, ‘http://Server_IP:443’ based on the settings below:

We will also check the box: Enable external access in Windows Firewall.


Configure load balancing in Thinfinity Remote Workspace v6.0, step 13


The Gateway URL (in the Broker Server)

Now that the gateway is configured, all we need to do is add the gateway URLs in the Broker Server Manager:


Configure load balancing in Thinfinity Remote Workspace v6.0, step 14

Configuring the License Server

When installing Thinfinity Remote Workspace in a Load Balancing environment, you must use our Licensing Server to pool the licenses between the back end broker servers. Below we will see how this is configured.

We will open the License Server Manager on the machine in which the gateway is installed.


Configure load balancing in Thinfinity Remote Workspace v6.0, step 15

On this screen, we will click add, and a menu will open, then select the Thinfinity Remote Workspace v6.0.


Configure load balancing in Thinfinity Remote Workspace v6.0, step 16

We will choose the ‘Activate a Serial Number Online’ option, and press ‘Next’.


Configure load balancing in Thinfinity Remote Workspace v6.0, step 17

Here we will have to complete the fields Email and Serial and press ‘Next’.


Configure load balancing in Thinfinity Remote Workspace v6.0, step 18

Configuring the License tab

In the license tab, we will configure the email address and serial number registered on the license server manager.

We will also write the licensing server URL on the primary field, in that field we will write the URL of the server in which the license server is installed and add port: 7443.

Example: https://Server_IP:7443.

We will select the use licensing server box.

Click ‘Apply’ and restart the services.


Configure load balancing in Thinfinity Remote Workspace v6.0, step 19


Verifying if the server is connected to the gateway

To verify if the Broker Servers are connected to the Gateway Servers, you can check the log file by clicking on ‘Show Log’


Configure load balancing in Thinfinity Remote Workspace v6.0, step 20


It should say something like:


Server started. Listening http on port 8443.

Broker: Connecting to http://127.0.0.1:8443/

Broker: Registered on http://127.0.0.1:8443/

Web Server: Connecting to http://127.0.0.1:8443/

Web Server: Registered on http://127.0.0.1:8443/


There are a few things to take into account when using load balancing:

If you are using One Time URL, you must share the ‘Root Path’ for Temporary Folders. This will also ensure the users have consistency with their intermediate disk (ThinDisk) when they access files from the file manager or upload/download files:


Configure load balancing in Thinfinity Remote Workspace v6.0, step 21


Bear in mind that if you only install the broker service on a server, you will have to register the license using the license server administrator.


Have any questions?

Book a call today to learn more about how Thinfinity can help your organization. We are always available to guide you and provide the best solution based on your specific needs.

The post How to configure Load Balancing in Thinfinity Remote Workspace v6.0 appeared first on Cybele Software, Inc..

How to install and use the Thinfinity Remote Printer Agent in Thinfinity Remote Workspace

$
0
0

With the new version of Thinfinity® Remote Workspace(v6.0) and Thinfinity® VirtualUI (v3.0) you will be able to take advantage of our new Printer Agent. This will allow you to send your print jobs directly to your local(s) printer(s).

Bear in mind, this feature will only be available for Enterprise editions.

Now, let’s get started!

The installation is very simple:

First download the printer agent setup from the link below:

https://www.cybelesoft.com/support/files/Thinfinity_Virtual_Channels_Agent_Setup_x86.exe

Once you have downloaded the file, execute the setup and follow these steps:

  1. In the ‘Welcome’ screen, press ‘Next’:


Install and use the Printer Agent, step 01


  1. Check ‘I accept the terms in the license agreement’ and press ‘Next’:


Install and use the Printer Agent, step 02


  1. Click ‘Install’:


Install and use the Printer Agent, step 03


  1. Check the box ‘Launch Thinfinity® Virtual Channels Agent’ and click ‘Finish’:


Install and use the Printer Agent, step 04


Now that we have finished installing the agent, you should be able to see a small icon for it in your system tray. You can right-click it and select ‘Setup Printer’ to configure your printer(s):


Install and use the Printer Agent, step 05

The agent should look similar to this:

Install and use the Printer Agent, step 06


You can see there are 2 different sections in the agent. There is a combobox to choose a printer and a list with checkboxes that will show all your available printers.

In the combobox you will select the default printer you want the “Thinfinity® Remote Desktop Printer / Thinfinity® VirtualUI Printer” to send the job to. If you leave this combobox blank, like below:


Install and use the Printer Agent, step 07


It will send the job to the normal remote printer, which will create a PDF file and print to the browser.

The redirected printers box will let you select which other printers you wish to have available on the ‘remote desktop/application’. Below is a practical example to understand this better:


Install and use the Printer Agent, step 08


In the screenshot above, you can see a few printers that say ‘redirected’ on its name. These printers are the ones I have ‘checked’ in the ‘Redirected Printers’ box.

If I send the print job to ‘Thinfintiy® Remote Desktop Server Printer’ (or Thinfinity® VirtualUI Printer) as in the screenshot below, the job will go to my local ‘Microsoft Print to PDF’ (the printer I chose in the combobox):


Thinfinity Remote Printer Agent - select the printer

But I will still be able to choose a different local printer if I wish (the ones allowed in the ‘Redirected Printers’ box).


Have any questions?

Book a call today to learn more about how Thinfinity can help your organization. We are always available to guide you and provide the best solution based on your specific needs.

Recent posts

The post How to install and use the Thinfinity Remote Printer Agent in Thinfinity Remote Workspace appeared first on Cybele Software, Inc..


One-Time passcode: the advantages of HOTP/TOTP (Thinfinity Remote Workspace)

$
0
0

We are happy to announce that Thinfinity Remote Workspace now supports 2FA natively in all its editions.

Thinfinity now counts with a built-in HTOP/TOTP server that enables you the advantage to add an extra layer of security to your projects using free and paid 3rd party Identity platforms.

Supported platforms:

  • Google Authenticator
  • DUO Mobile
  • Microsoft Authenticator
  • Okta Verify

Now you can enable an authentication experience to your environment that is accepted by all the most popular Cybersecurity frameworks.

To configure the One-Time passcode on Thinfinity Remote Workspace, you will have to add the authentication method on the tab ‘Authentication’, go to the tab ‘2FA’, and add the option ‘TOTP’.


One-Time passcode: the advantages of HOTP/TOTP, step 01


If you want to make the Second Factor Authentication compatible with Google Authenticator, check the ‘Google Authenticator Compatible’ checkbox.


One-Time passcode: the advantages of HOTP/TOTP, step 02

You can also specify which authentication method you will use on the tab ‘Methods’:


One-Time passcode: the advantages of HOTP/TOTP, step 03

Click on ‘Apply’ after you finish configuring all available options.

Next time the user authenticates on the Thinfinity Login page, he will be prompted to scan a QR code for matching his user to a Second-step Code Generate App:


One-Time passcode: the advantages of HOTP/TOTP, step 04


After matching the user with the Second-step Code Generate App, enter the verification code and click on ‘Continue’

The next time the user authenticates, the QR code will be replaced by the following image:


One-Time passcode: the advantages of HOTP/TOTP, step 05


If the user lost access to its Second-step Code Generate App and needs to be reset, this can be done from the Server Manager.

Click on the ‘Reset 2FA key for user’, search for the username, and click ‘OK’:


One-Time passcode: the advantages of HOTP/TOTP, step 06


If the user needs help remembering his username, it can be verified by using the ‘I don’t have access to my authentication device’ button.


One-Time passcode: the advantages of HOTP/TOTP, step 07


Have any questions?

Book a call today to learn more about how Thinfinity can help your organization. We are always available to guide you and provide the best solution based on your specific needs.

The post One-Time passcode: the advantages of HOTP/TOTP (Thinfinity Remote Workspace) appeared first on Cybele Software, Inc..

How to configure Thinfinity VirtualUI and Thinfinity Remote Workspace to authenticate using Ping Identity’s SAML

$
0
0

In this new post, we will show you a “step by step” on how to set up SAML on Ping Identity’s portal and how to set this up in Thinfinity Worskpace/VirtualUI.

First, open the Thinfinity Worskpace/VirtualUI manager and go to the ‘Authentication’ tab. Once there, click ‘Add’ and select ‘SAML’:


Configure Thinfinity VirtualUI to authenticate using Ping Identity’s SAML, step 01

Add a “Name” and “Virtual Path”. For testing purposes, use ‘SAMLACS’ as Virtual Path (we will use this information later on):


Configure Thinfinity VirtualUI to authenticate using Ping Identity’s SAML, step 02


Leave this window open in your manager for now, you won’t be able to proceed anymore in it until we fill out the rest of the fields with the information we’re going to get from PingIdentity.

Now, log into your Ping Identity admin portal, on the sidebar, click on ‘Connections’, and then click ‘Applications’.


Configure Thinfinity VirtualUI to authenticate using Ping Identity’s SAML, step 03Configure Thinfinity VirtualUI to authenticate using Ping Identity’s SAML, step 04

On this screen, click the “+” button to add an application:


Configure Thinfinity VirtualUI to authenticate using Ping Identity’s SAML, step 05


Afterwards, fill out a Name and Description, select ‘SAML Application’ and click on ‘Configure’ below:


Configure Thinfinity VirtualUI to authenticate using Ping Identity’s SAML, step 06


On the next screen, select ‘Manually Enter’ and fill out the fields below.

The Assertion Consumer Service URL (ACS URLs), you must enter your public URL for your Thinfinity Workspace/VirtualUI server followed by the Virtual Path of the authentication method you configured in the Thinfinity Workspace/VirtualUI manager

Enter the ‘Entity ID’ URL, this is the public URL for your Thinfinity Workspace/VirtualUI server (e.g. http(s)://Server_DNS:port)
IMPORTANT: You must declare the binded port in both URLs, otherwise we won’t be able to log in.
Click Save afterwards:


Configure Thinfinity VirtualUI to authenticate using Ping Identity’s SAML, step 07


On the next screen, we need to click the gears icon in PROTOCOL


Configure Thinfinity VirtualUI to authenticate using Ping Identity’s SAML, step 08


Inside, we want to click ‘Download Signing Certificate’, and choose the X509 PEM (.crt) format.
We’ll need this certificate later on, so save it locally in an easy location in your Thinfinity Workspace/VirtualUI server. 

You can also rename the file if you wish to, We’ll use ‘C:\SAML\SAML.crt’ as an example, like so: 


Configure Thinfinity VirtualUI to authenticate using Ping Identity’s SAML, step 09

Configure Thinfinity VirtualUI to authenticate using Ping Identity’s SAML, step 10

If you scroll further below in this screen, you can set the Assertion Validity Duration, minimum required is 60 seconds:


Configure Thinfinity VirtualUI to authenticate using Ping Identity’s SAML, step 11


Click ‘Save’.

Afterwards, click on ‘Attribute Mappings’ and then click the Edit button:


Configure Thinfinity VirtualUI to authenticate using Ping Identity’s SAML, step 12


We want to change the setting to ‘Email’, like so:


Configure Thinfinity VirtualUI to authenticate using Ping Identity’s SAML, step 13


Click ‘Save’ afterwards.

Now click on ‘Policies’ and click the Edit button afterwards:

Configure Thinfinity VirtualUI to authenticate using Ping Identity’s SAML, step 14

Here, we can set which authentication policies we’re going to enable for signing in. For testing purposes, we’ll only enable Single Factor, click ‘Save’ afterwards:


Configure Thinfinity VirtualUI to authenticate using Ping Identity’s SAML, step 15

Next, click the ‘Configuration’ tab, the following information will be displayed, which we’ll need to complete the SAML authentication method window that we left open in the Thinfinity Workspace/VirtualUI at the beginning of this guide:


Configure Thinfinity VirtualUI to authenticate using Ping Identity’s SAML, step 16


Back to the Thinfinity Workspace/VirtualUI manager, fill the rest of the fields with the information from PingIdentity following this reference:

Service Identifier = Identity Provider ‘Entity ID’

  • Service Certificate File = Your certificate file 
  • Service Certificate Password = Your certificate’s password
  • Identificacion Entity ID = Issuer ID
  • Single Sign-On Service URL = Identity Provider ‘Single SignOn Service URL’
  • Sign-Out URL = This value is optional
  • Partner Certificate File = X.509 Certificate provided by Ping Identity

‘Service Certificate File’ is where we declare the name and password of the certificate that will be created for this authentication method, this must not be confused with the certificate we downloaded earlier. Enter a name of your preference and a password of your choice in these fields.

The path to the certificate previously downloaded is the one we declare in the last field ‘Partner Certificate File’.


Configure Thinfinity VirtualUI to authenticate using Ping Identity’s SAML, step 17

Click ‘OK’.

Back in the ‘Authentication’ tab, switch to the ‘Mappings’ tab and map your email address to the local AD user or group:


Configure Thinfinity VirtualUI to authenticate using Ping Identity’s SAML, step 18


Above, I mapped an email address to an AD user, but you can also use a wild-card. For instance, you can add ‘*@cybelesoft.com’ as ‘Authentication ID mask’ and map this back to the ‘Cybelesoft\Domain Users’ group in your AD.

Finally, we have to enable user access to SAML on Ping Identity, you will find a little switch to do so in its settings (Usually disabled by default):


Configure Thinfinity VirtualUI to authenticate using Ping Identity’s SAML, step 19


Now after applying the changes to the Thinfinity Remote Desktop manager, go to the Thinfinity Remote Desktop site, and you should be able to see the ‘Ping Identity SAML’ authentication method listed:


Configure Thinfinity VirtualUI to authenticate using Ping Identity’s SAML, step 20


Have any questions?

Book a call today to learn more about how Thinfinity can help your organization. We are always available to guide you and provide the best solution based on your specific needs.

Recent posts

The post How to configure Thinfinity VirtualUI and Thinfinity Remote Workspace to authenticate using Ping Identity’s SAML appeared first on Cybele Software, Inc..

How to create SSH connections from your browser using the New Thinfinity Remote Workspace

$
0
0

In this quick tutorial, we’ll learn how to create an SSH connection to be accessible from your HTML5 browser to a Linux terminal using our latest Thinfinity Remote Workspace version which among other new features includes SSH, Telnet, VNC, and RFB connections.

Please note, you can create an SSH connection to almost any SSH compatible terminal, meaning Network devices, Linux terminals, Windows PowerShell over SSH, and more…

Firstly, we need to create an SSH session from Thinfinity. To do this just navigate to the Access Profiles tab, and from there click on add, and select Telnet/SSH.


Create SSH connections from your browser using the Thinfinity Remote Workspace, step 01


From there, we just need to name the connection, point to the IP we want to log in, select SSH, and it will update the port number automatically to its default.


Create SSH connections from your browser using the Thinfinity Remote Workspace, step 02

Now we should choose the Protocol Version (SSH 1 or SSH2) and the information to authenticate (Username and Password) you can even upload a Private Key to authenticate in a secure way.


Create SSH connections from your browser using the Thinfinity Remote Workspace, step 03

Now we just have to log in to our Thinfinity web page and choose our SSH Linux connection.

In my case, I’m pointing to my private IP address in my browser as http://192.168.0.219:8443. Now we just have to click the connection and wait for the SSH terminal to load.


Create SSH connections from your browser using the Thinfinity Remote Workspace, step 04

And this is how the SSH terminal looks like from inside your browser 🙂


Create SSH connections from your browser using the Thinfinity Remote Workspace, step 05


Have any questions?

Book a call today to learn more about how Thinfinity can help your organization. We are always available to guide you and provide the best solution based on your specific needs.

Recent posts

The post How to create SSH connections from your browser using the New Thinfinity Remote Workspace appeared first on Cybele Software, Inc..

Thinfinity Remote Workspace Server on Google Cloud

$
0
0

In this step-by-step tutorial, we will show you how to publish your Thinfinity Remote Workspace server using Google Cloud Computing.

1) Navigate to https://console.cloud.google.com/ , and click on “Navigation Panel” -> “Compute Engine” -> “VM Instances”.


Thinfinity Remote Workspace Server on Google Cloud, step 01


2) Select a project if you have one already, or create a new one if you need to do so.

In this case, we created a project called “Thinfinity Cloud”.

Press “Continue” once you are ready.


Thinfinity Remote Workspace Server on Google Cloud, step 02

3) Click on the “Create” button in the “VM Instances” menu:


Thinfinity Remote Workspace Server on Google Cloud, step 03

4) Now, we need to configure the VM itself, the important fields here are:


Thinfinity Remote Workspace Server on Google Cloud, step 04

“Name” = The name of the Virtual Machine.

“Region” = Select the region closest to your location.

“Machine type” = This will determine how “big” the Virtual Machine is in terms of CPU and RAM.

In this case, we are going to use a small 1 vCPU, 3.75 GB of RAM, Virtual Machine.

Please note: Large deployments will require bigger Virtual Machines.

“Boot Disk” = Select one of the available Windows versions:


Thinfinity Remote Workspace Server on Google Cloud, step 05

We recommend using “Windows Server 2019 Datacenter”
5) Scroll below and in the “Firewall”” section, check both HTTP and HTTPS options.


Thinfinity Remote Workspace Server on Google Cloud, step 06


6) Click the “Create” button.

7) Once the instance has been created, click on the pointing down arrow and on “Set Windows Password”:


Thinfinity Remote Workspace Server on Google Cloud, step 07

This will allow you to create a Windows user for this machine and will also give you the password used for connecting with RDP.

8) Open mstsc.msc (Remote Desktop) and establish a connection to your VM using the ‘External IP’ and the credentials you just configured.
Once the ‘Server Manager’ has finished loading, click on ‘Local Server’ and on the ‘IE Enhanced Security Configuration’.


Thinfinity Remote Workspace Server on Google Cloud, step 08

Change both “Administrators” and “Users” to “Off”:


Thinfinity Remote Workspace Server on Google Cloud, step 09


9) After the “IE Enhanced Security Configuration” changes “Off”, open Internet Explorer and download Thinfinity using this link:

https://www.cybelesoft.com/download/

Now that you downloaded the setup file to your Google Cloud Computer Virtual Machine, it’s time to install Thinfinity Remote Workspace!

Please, follow this tutorial:

https://www.cybelesoft.com/blog/how-to-install-thinfinity-remote-workspace/


Have any questions?

Book a call today to learn more about how Thinfinity can help your organization. We are always available to guide you and provide the best solution based on your specific needs.

Recent posts

The post Thinfinity Remote Workspace Server on Google Cloud appeared first on Cybele Software, Inc..

Set the RDP resolution to match the browser’s display settings

$
0
0

Have you ever wonder how to change screen resolution in your Remote Desktop session? We’ve now added a new feature to our Thinfinity Remote Desktop, called “Update session resolution on resize”.
This new feature automatically adjusts the RDP screen resolution to the browser’s resolution, without needing to “refresh” the browser for the new screen resolution to be applied.


Set the RDP resolution to match the browser's display settings. step 01


This new option uses the “Dynamic Resolution Update”, and is only available for Windows editions that are running RDP 8.1 ( Windows Server 2012 or newer, Windows 8.1/10 ).
To enable this new feature, edit your existing “Access Profiles”, navigate to the “Display” tab, and check the “Update Session resolution on resize”, as shown below:


Set the RDP resolution to match the browser's display settings. step 02


New “Access Profiles” created after the update will enable this option by default.
Have any questions? Would you like to suggest any other feature?

Contact us at support@cybelesoft.com or leave a message on this same post.

Have any questions?

Book a call today to learn more about how Thinfinity can help your organization. We are always available to guide you and provide the best solution based on your specific needs.

The post Set the RDP resolution to match the browser’s display settings appeared first on Cybele Software, Inc..

How to configure JumpCloud + SAML for your Thinfinity RDP Server for Thinfinity Remote Workspace

$
0
0

This is a quick tutorial to integrate and configure JumpCloud with SAML for your Thinfinity Remote Workspace (insert link) deployment.

1) Enter your Jumpcloud MTP dashboard and enter the ‘Organizations’ tab on top and click ‘Launch’ in your organization below to enter the MTP portal.
Then, on the side panel, click on “SSO” and the plus icon afterward.


Configure JumpCloud + SAML for your Thinfinity RDP Server, step 01


Click on “Create custom App” button:


Configure JumpCloud + SAML for your Thinfinity RDP Server, step 02


Create a Label for your app login:


Configure JumpCloud + SAML for your Thinfinity RDP Server, step 03


Click on SSO tab, and you will be able to set the SAML parameters:


Configure JumpCloud + SAML for your Thinfinity RDP Server, step 04


IDP Entity ID : https://sso.jumpcloud.com/saml2/saml2


  • SP Entity ID : https://MyThinfinityIP:[Port]/

ACS URL : https://MyThinfinityIP:[Port]/SAMLAssertionConsumerService


You can also customize the IDP url further below in that same screen, make sure you set the same URL in IDP Entity ID if you choose to do so:


Configure JumpCloud + SAML for your Thinfinity RDP Server, step 05


Click ‘Activate’ afterward.
2) In your ‘Thinfinity Workspace/VirtualUI’ manager, go to the ‘Authentication’ tab and add a SAML authentication method:


Configure JumpCloud + SAML for your Thinfinity RDP Server, step 06


You will need to fill the fields with the information matching the settings we set previously in Jumpcloud, remember the ‘Service Certificate File’ is created automatically in the route you choose (In our case “C:\temp\sp.pfx) and the ‘Partner Certificate File’ we need to download from the SAML provider, Jumpcloud in this case. 


Configure JumpCloud + SAML for your Thinfinity RDP Server, step 07


3) Back in your Jumpcloud portal, go to SSO in the side panel and click your, now created, ‘App login’:


Configure JumpCloud + SAML for your Thinfinity RDP Server, step 08


Click on SSO and on the left panel you will be able to download the previously mentioned ‘Partner Certificate’:


Configure JumpCloud + SAML for your Thinfinity RDP Server, step 09


Make sure to save it and then declare it properly in your ‘Thinfinity Workspace/VirtualUI’ Manager:


Configure JumpCloud + SAML for your Thinfinity RDP Server, step 10


Now we need to create the user(s) in Jumpcloud that are able to access the app, go to ‘Users Group’ and click the + button:


Configure JumpCloud + SAML for your Thinfinity RDP Server, step 11


Create a user group with any name you wish, then go to the ‘Users’ tab and add whichever users you want to the group:


Configure JumpCloud + SAML for your Thinfinity RDP Server, step 12


Now, click the ‘Applications’ tab and select the ‘App’ access we just created to link it to the user group:


Configure JumpCloud + SAML for your Thinfinity RDP Server, step 13


5) Back on the ‘Thinfinity Workspace/VirtualUI’ Manager, click on the ‘Mappings’ tab, and press the first ‘Add’:


Configure JumpCloud + SAML for your Thinfinity RDP Server, step 14


The ‘Authentication ID Mask’ must match the user sent from JumpCloud, for example:


Configure JumpCloud + SAML for your Thinfinity RDP Server, step 15


Click ‘Ok’. You should now see the user in the ‘Authentication ID Mask’ list. Below, you’ll find different examples of how you can integrate it:


Configure JumpCloud + SAML for your Thinfinity RDP Server, step 16


Click on the user you added, and press on the second ‘Add’. The ‘Select Users or Group’ window will be displayed.

Here, you will map the ‘External’ user (the JumpCloud credentials) to an ‘Internal’ user (Windows user) , so that Thinfinity can specify which ‘Access Profile’ will be displayed to each ‘external’ user. (‘Permissions’ tab in the ‘Access Profile Editor’):


Configure JumpCloud + SAML for your Thinfinity RDP Server, step 17


Click ‘Apply’.


6) Navigate to the Thinfinity URL, and you should see the new authentication method:


Configure JumpCloud + SAML for your Thinfinity RDP Server, step 18


If JumpCloud SAML is the only authentication method, then Thinfinity will redirect you directly to the JumpCloud login page:


Configure JumpCloud + SAML for your Thinfinity RDP Server, step 19


Have any questions?

Book a call today to learn more about how Thinfinity can help your organization. We are always available to guide you and provide the best solution based on your specific needs.

Recent posts

The post How to configure JumpCloud + SAML for your Thinfinity RDP Server for Thinfinity Remote Workspace appeared first on Cybele Software, Inc..

Avoid the single point of failure on your Thinfinity Remote Workspace architecture

$
0
0

Check this Thinfinity Remote Workspace (insert link) hint and apply the High-Availability feature to avoid the single point of failure on your Remote Access/Cloud Computing architecture.

Contact us to get the installer License Server Administrator link.

In order to use the High-Availability feature, you’ll need to install the License Server Administrator on two different servers. It isn’t required for both License Servers to be on the same network. If they aren’t you’ll need to ensure the License Server Administrator port is open (by default it’s 7443).

One of the servers will act as the Primary license server and the other as the Backup. You configure each role in the ‘Communications’ tab of the License Server Administrator manager.

Primary Server:

The configuration for this is pretty simple. You just need to select the ‘Server role’ to ‘Primary’:


Avoid the single point of failure on your architecture, step 01


Backup Server:

In the ‘Communication’ tab, change ‘Server role’ to ‘Backup’. The next step would be entering the ‘Primary server URL’ and linking this to the Backup Server address.


Avoid the single point of failure on your architecture, step 02


Bear in mind, it isn’t required to have a public address. If everything runs locally, you can just enter the local IP address in the URL.

Finally, you have to configure the Configuration Manager to load the license from a License Server. In order to do so, you just need to configure both License Server URLs in its manager.

If this is the first time you install the Configuration Manager on a server, you will be prompted to register the license right after you start the manager. Select ‘Activate a Serial Number online’ and click next.

In the following screen you’ll have to fill the E-mail, Serial, and both License Server URLs, Primary and Backup:


Avoid the single point of failure on your architecture, step 03


If Thinfinity Remote Workspace is already licensed, just go to the ‘Licenses’ tab, enable ‘Use Licensing Server’ and fill in the Licensing Servers URLs.


Avoid the single point of failure on your architecture, step 04


Once you configure this and apply the changes, you might need to restart the services.

Bear in mind also, that if you have multiple ‘Configuration Managers’ connecting to a license server, you must configure the same ‘Network ID’ on each of them. You will find this option in the ‘General’ tab:


Avoid the single point of failure on your architecture, step 05


The ‘Network ID’ doesn’t have to follow any special format, you can put anything in there, for instance, ‘test’.


Book a call today to learn more about how Thinfinity can help your organization. We are always available to guide you and provide the best solution based on your specific needs.

Recent posts

The post Avoid the single point of failure on your Thinfinity Remote Workspace architecture appeared first on Cybele Software, Inc..


Host any Windows applications on Windows VPS with Thinfinity Remote Workspace

$
0
0

It is a great advantage to have a version of your Windows app available online. Isn’t it? You may now host any software on Vultr Windows VPS. No coding skills needed!

Not familiar with Vultr hosting services? Visit www.vultr.com


Today, we’ve prepared a guide with the steps necessary to set up our RemoteApp feature for Thinfinity Remote Workspace on a Vultr cloud.


First, we’ll install Thinfinity Remote Workspace Server on the Vultr server, select it and then, click the “View Console” button, like so:


Host any Windows applications on Windows VPS, step 01

Once on the server, download Thinfinity Remote Workspace:


Host any Windows applications on Windows VPS, step 02


Run the Remote Workspace Server setup, in this case, we’re choosing to install both, the Gateway and Broker, on the same cloud:


Host any Windows applications on Windows VPS, step 03


Activate your Thinfinity Remote Workspace server license:


Host any Windows applications on Windows VPS, step 04


Now go to “Add” > RDP on the “Access Profiles” tab:


Host any Windows applications on Windows VPS, step 05


On the Profile Editor, type the IP address of the server you wish to connect to.


Host any Windows applications on Windows VPS, step 06


Then on the Program tab of the “Profile Editor” specify the RemoteApp feature along with the path and file name of the intended application. Afterward, click “OK”, then apply:


Host any Windows applications on Windows VPS, step 07


Enter a browser and type the address to the Remote Workspace Server index page (ex: http://localhost:8443). Then click on the newly created connection:


Host any Windows applications on Windows VPS, step 08


Make sure the intended application is shown rather than the full desktop:


Host any Windows applications on Windows VPS, step 09


And that’s it, you are now able to run a specific app hosted on Vultr VPS with a Thinfinity Remote Workspace connection.


Have any questions?

Book a call today to learn more about how Thinfinity can help your organization. We are always available to guide you and provide the best solution based on your specific needs.

Recent posts

The post Host any Windows applications on Windows VPS with Thinfinity Remote Workspace appeared first on Cybele Software, Inc..

Browser web access Linux mint mate

$
0
0

Did you ever have the need to access your Linux Mint MATE desktop from your Windows Environment? We do! And also our clients, so this Thinfinity Remote Workspace  guide is for all our Linux-savvy people who might need this solution.

This tutorial has been done under the latest Linux Mint release, which happens to be the 19.3 Tricia release with MATE desktop. We will also use XorgXRDP from neutrinolabs repositories.

XorgXRDP is a set of drivers (screen device, keyboard, and mouse) for X.org enabling the use through an RDP session with XRDP.


Browser web access Linux mint mate, step 01


First, we need to have our packages/dependencies up to date. To do this, just run

$ sudo apt update

$ sudo apt upgrade

Once we did the update, we can now start installing Xorg from our terminal.

$ sudo apt install xrdp xorgxrdp

It’s possible you might have to install some missing dependencies. In our case, we were missing xorg-video-abi-23 and xserver-xorg-core dependencies.


Browser web access Linux mint mate, step 02


We can install them with the following commands:

$ sudo apt install xorg-video-abi-23

$ sudo apt install xserver-xorg-core

Now that we have these missing dependencies installed, we can perform the Xorg XRDP installation again.

$ sudo apt install xrdp xorgxrdp

IMPORTANT NOTE: You will notice that installing this package will trigger the removal of packages *xserver-xorg-hwe-18.04* which might be used or needed by your system. So, you might lose keyboard and mouse input when connecting locally to the machine. To fix this issue, you’ll have to issue the following command.

$ sudo apt install xserver-xorg-input-all

We also need to add the xrdp user to the ssl-certs and need to open our 3389 port on our Firewall

$ sudo adduser xrdp ssl-cert

$ sudo ufw allow 3389/tcp

Be aware, by typing the ufw allow 3389/tcp you would allow any connection from the outside from any IP address. To be more granular on this, we can specify our IP address by typing the“sudo ufw allow from 192.168.0.219 to any port 3389 proto tcp” By doing this, I’m only allowing my private IP address to access our Linux VM.

Now that we have finished installing xRDP, we have to publish this Linux Mint desktop in our Thinfinity Remote Workspace.

We just have to go to our profile editor, create the RDP connection and type the Linux IP as shown in the following screenshot.


Browser web access Linux mint mate, step 03


Now we are able to access our Linux Mint Desktop, from any HTML5 compatible browser, from any device we like. Beautiful, isn’t it?


Browser web access Linux mint mate, step 04

Have any questions?

Book a call today to learn more about how Thinfinity can help your organization. We are always available to guide you and provide the best solution based on your specific needs.

Recent posts

The post Browser web access Linux mint mate appeared first on Cybele Software, Inc..

How to share an RDP session with Thinfinity Remote Workspace

$
0
0

You can use Thinfinity Remote Desktop Server to follow up the progress of your students by sharing their RDP session

Lots of our clients have training applications and use Thinfinity Remote Workspace (insert link) to provide remote access to the Virtual classrooms.

Some time ago, we wrote a couple of tips on how to share your RDP session with another user by taking advantage of the “Share session” feature of Thinfinity Remote Workspace.

The Share Session URL feature can help you build an interactive classroom, so you can check on your student progress, or you can simply monitor user’s sessions.

In this second article, we’ll teach you how to programmatically retrieve a Shared Session URL using JavaScript (currently available only for One Time URL sessions).

Using this feature, you’ll be able to take control of the shared RDP session of a student or simply shadow sessions to follow up the progress.

In order for the Shared Session URL to work, you need to download a new ssurl.js JavaScript file. You can download it here.

(Inside this zip file you’ll also find the code example detailed below).

share an RDP sessionClick to enlarge

Now, let’s get started:

First, you need to get the Gateway Access Key, like this:

   function getGAK() {

        getGatewayAccessKey(null, oturl.key, oturl.pass,

            function(gak) {

                oturl.gak = gak;

                document.getElementById(‘gak’).value = gak;

            },

            function(msg) {

                alert(msg);

            })

    }

Secondly, you can create the Sharing Session URL, like this:

    function createSSUrl() {

        createSharedSession(null,oturl.gak,oturl.key,oturl.pass,document.getElementById(‘viewonly’).checked,

            function (url) {

                var surl = location.protocol + ‘//’ + location.host;

                document.getElementById(‘ssn’).href = surl + url;

                document.getElementById(‘ssn’).innerText = document.getElementById(‘ssn’).href;

            },

            function (msg) {

                alert(msg);

            })

    }


Have any questions?

Book a call today to learn more about how Thinfinity can help your organization. We are always available to guide you and provide the best solution based on your specific needs.

The post How to share an RDP session with Thinfinity Remote Workspace appeared first on Cybele Software, Inc..

Publish any Windows application to the web with Thinfinity Remote Workspace

$
0
0

Microsoft RemoteApp is a feature of Microsoft’s Remote Desktop Services that allows individual programs to be run remotely using a Microsoft Remote Desktop Client. Instead of accessing the entire remote desktop, Microsoft RemoteApp allows users to see and interact with just the application as if they were running on the end-user’s device. 

Combining Microsoft Remoteapp with Thinfinity® Remote Workspace you can publish any Windows Application on the web and access it from any device using a HTML5 browser

You can configure Thinfinity® Remote Workspace to publish any Windows application throughout the web in less than 5 minutes, and in this tutorial we are going to teach you how to do it.  

You don’t need to have any programming skills or make any modifications to the Windows application source code to accomplish it. 

(Remember that RemoteApp is only available for Windows Server with Remote Desktop Services installed, so we recommend checking your environment before you start following this tutorial)

Let’s get started:

  • First, open the Thinfinity® Configuration Manager:


Publish any Windows application to the web with Thinfinity Remote Workspace with Thinfinity Remote Workspace, step 01


  • Click on the “Access Profiles” tab, and press “Add”. For this guide, we’ll be creating an “RDP” connection:


Publish any Windows application to the web with Thinfinity Remote Workspace with Thinfinity Remote Workspace, step 02


  • Configure the Access Profile with a “Name”, then on “Computer” enter the IP Address or domain name of the server, and on “Credentials” enter the Windows credentials to authenticate to said server:


Publish any Windows application to the web with Thinfinity Remote Workspace with Thinfinity Remote Workspace, step 03


  • For testing purposes, check the “Allow anonymous access” option:


Publish any Windows application to the web with Thinfinity Remote Workspace with Thinfinity Remote Workspace, step 04


  • Under the ‘Program’ tab, choose the “Execute as RemoteApp” option. 


Then, point both the “Program path and the filename” and “Start in the following folder” fields to the executable’s directory and its root folder, respectively. 

You can also pass arguments to your application in the “Arguments” field:


Publish any Windows application to the web with Thinfinity Remote Workspace with Thinfinity Remote Workspace, step 05


  • For testing purposes, mark the check-box for “Allow anonymous access” under the “Authentication” tab:


Publish any Windows application to the web with Thinfinity Remote Workspace with Thinfinity Remote Workspace, step 06


  • Press “Apply”:


Publish any Windows application to the web with Thinfinity Remote Workspace with Thinfinity Remote Workspace, step 07


  • You can open the published application by going to http://127.0.0.1:Port and clicking on the newly created Profile:


Publish any Windows application to the web with Thinfinity Remote Workspace with Thinfinity Remote Workspace, step 08


  • If you start multiple RemoteApps, you’ll find a dock menu at the bottom of the browser screen, this allows you to toggle between different applications of the same connection.

You can resize the App’s windows and be able to see more than one at the same time.

You can also pin this menu to be always on top, or unpin it to automatically hide it.

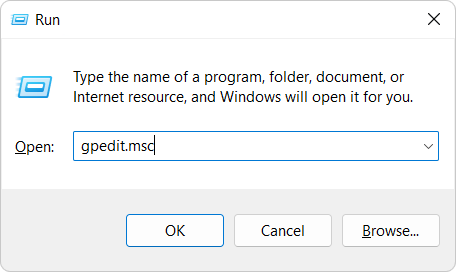
If you get an “access denied” error, you would need to enable a group policy to allow unlisted programs to be started. To this end, open the ‘Group Policy Editor’ by going to ‘Start > Run > gpedit.msc’:


Publish any Windows application to the web with Thinfinity Remote Workspace with Thinfinity Remote Workspace, step 09


  • On the ‘Group Policy Editor’ navigate to: 

Computer Configuration > Administrative Templates > Windows Components > Remote Desktop Services > Remote Desktop Session Host > Connections > Allow users to connect remotely by using Remote Desktop Services”


Publish any Windows application to the web with Thinfinity Remote Workspace with Thinfinity Remote Workspace, step 10


  • Double-click on this policy and then click on the check-box next to “Enabled“:


Publish any Windows application to the web with Thinfinity Remote Workspace with Thinfinity Remote Workspace, step 11


  • Afterwards, you’ll have to update the group policies. In order to do this, call “gpupdate /force” from a “Command Prompt”’ window elevated as an Administrator:


Publish any Windows application to the web with Thinfinity Remote Workspace with Thinfinity Remote Workspace, step 12


  • If you want to give your users quick access to your applications, you can create a desktop shortcut to the URL of Thinfinity® Remote Workspace with the Virtual Path of the application. Here’s an example:


Publish any Windows application to the web with Thinfinity Remote Workspace with Thinfinity Remote Workspace, step 13


  • To ensure these changes are applied, you can go to “Start > Run > services.msc” and restart the “Thinfinity Service Manager“:


Publish any Windows application to the web with Thinfinity Remote Workspace with Thinfinity Remote Workspace, step 14


  • You can check our live demo and experience this feature yourself. You will be able to test this feature with the following Profiles:
    • Desktop
    • Notepad
    • Paint


Publish any Windows application to the web with Thinfinity Remote Workspace with Thinfinity Remote Workspace, step 15


That’s it!

You can explore our other remoting and web-enabling solutions, enjoy our free trials, or request a custom demo HERE. No commitment!


Have any questions?

Book a call today to learn more about how Thinfinity can help your organization. We are always available to guide you and provide the best solution based on your specific needs.

Recent posts

The post Publish any Windows application to the web with Thinfinity Remote Workspace appeared first on Cybele Software, Inc..

Printing Documents Using Thinfinity Remote Workspace

$
0
0

One of the most common user requirements is to enable remote desktop printing.


Whether you run Windows applications from a web browser or access a virtual desktop, printing files to a local printer is perhaps one of the most common tasks.

This article is a practical guideline for remote desktop printing, but if you need to install the Thinfinity Remote Printer Agent, you may need to check this guide instead.


Enable printing to a local printer from remote desktop

Enabling the remote printer in Thinfinity Remote Workspace is very simple.

If you are using “Access Profiles” you can enable this in the “Printer” tab:

Printing documents using Remote Workspace, step 01


If you connect directly using the web interface, you will find this option in the “Resources” tab:


Printing documents using Remote Workspace, step 02


Thinfinity Remote Desktop uses a PostScript Printer Driver.
Depending on the remote desktop’s Windows version you are connected to, it is necessary to set a different PostScript Printer Driver:

  • HP Color LaserJet 2800 Series PS driver is compatible with 2008 Windows versions.
  • HP Color LaserJet 8500 PS driver is compatible with 2003 Windows versions.
  • Microsoft XPS Document Writer V4 driver is compatible with Windows Server 2012, Windows Server 2016, Windows 8, and Windows 10.

Once you are connected to the remote desktop and the printer is enabled, you will be able to print from the remote desktop to a local printer, by choosing the ThinRDP Printer from the available printers:


Printing documents using Remote Workspace, step 03


After you print the document, you will get prompted to open it:


Printing documents using Remote Workspace, step 04

Finally, the document will be previewed in the web browser with the default PDF viewer, and you will be able to send it to your local printer.

Happy RDP printing!


Have any questions?

Book a call today to learn more about how Thinfinity can help your organization. We are always available to guide you and provide the best solution based on your specific needs.

Recent posts

The post Printing Documents Using Thinfinity Remote Workspace appeared first on Cybele Software, Inc..

Viewing all 101 articles
Browse latest View live